Showing posts with label change. Show all posts

Wednesday, March 1, 2017

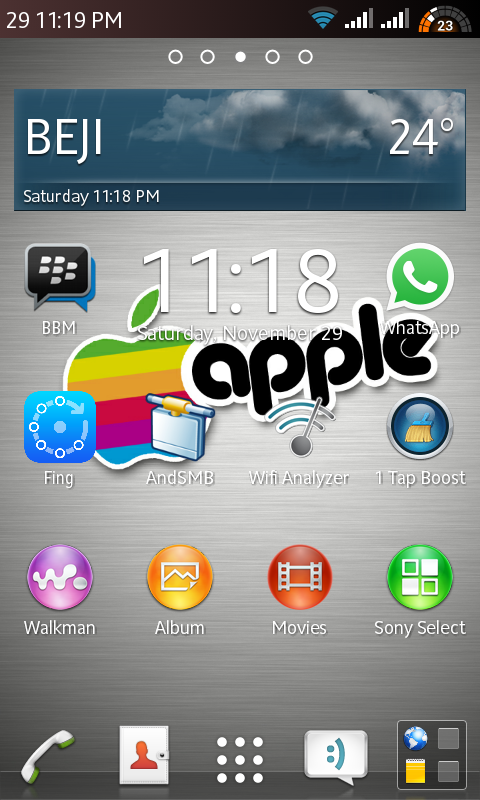
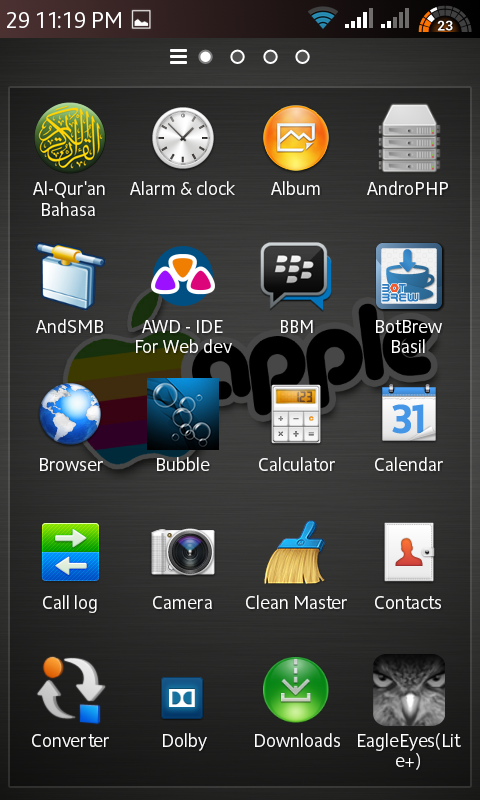
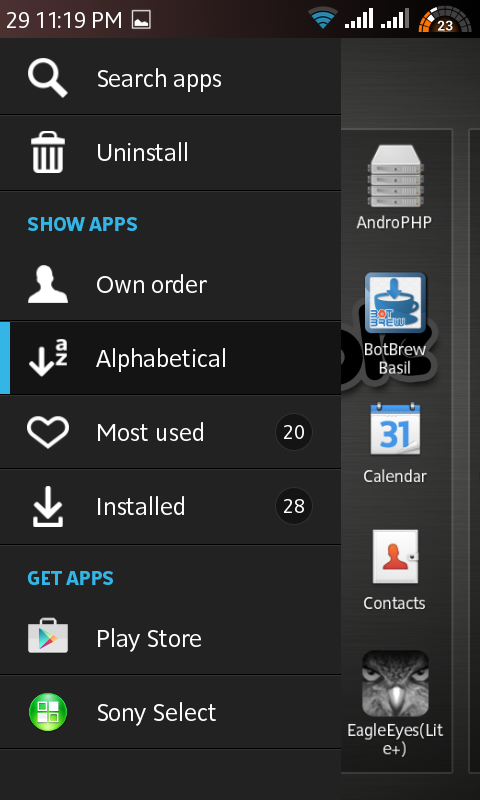
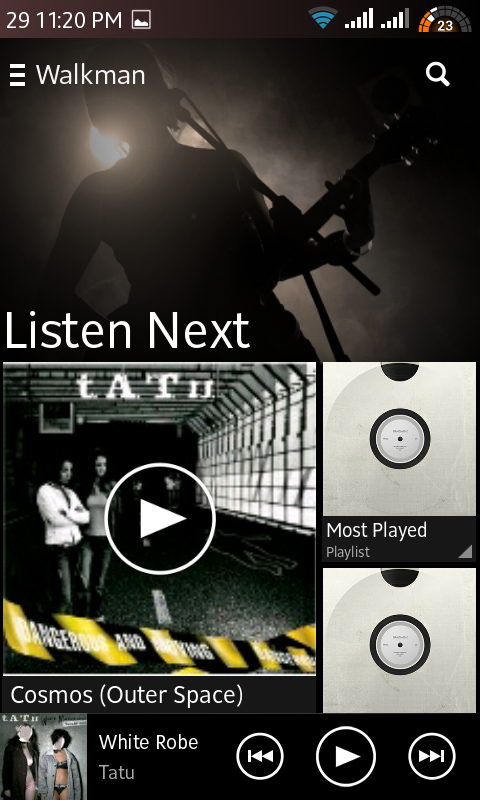
How to change rom Lenovo A316i to be Xperia Papyrus 2014

How to change rom Lenovo A316i to be Xperia Papyrus 2014


Welcome to localtechno, this time localtechno will share something with you all, the tips and tricks this time is about changing your A316i lenovo mobile phone, into the ROM xperia papyrus, how to measure it and what you should do, let us consider the following tips and tricks this :

First, you must have done a root on the target phone, if still not rooted then you can read the article, how to root the phone china easily HERE.

Second, your mobile phone must be installed CWM recovery, if not you can read HERE.

Third, download the ROM xperia HERE, then after the download is complete,
place the xperia ROM on the sdcard and do not enter into the folder.

Fourth, reboot into CWM recovery menu, you can do it by :

1. Turn off HP, press the power button and volume up simultaneously and
hold until the boot selection menu appears on the HP, then select recovery.

2. Delete user data, cache partititon and Dalvik cache.

3. Select install.zip from sd card, select the ROM xperia.zip who have downloaded earlier, and
select install.

Wait until the process is completed and enjoy Lenovo A316i, with a sense of the Sony Xperia ;)

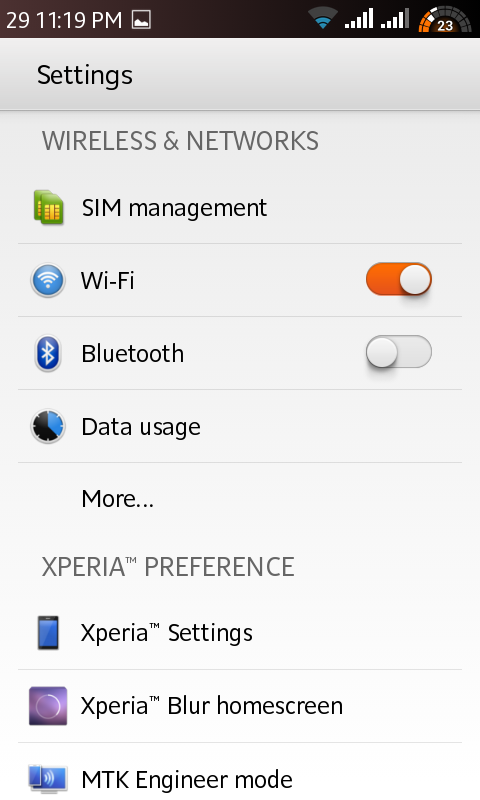
Look this Screenshot :


Thanks for coming and dont forget give this blog spirit from your like :)


Available link for download

Read more »

Friday, February 17, 2017

How To Change The Mouse Scroll Wheel Speed In Linux Using imwheel Quick Tip

How To Change The Mouse Scroll Wheel Speed In Linux Using imwheel Quick Tip


mouse

Ive never actually needed to modify the mouse scroll wheel speed until recently, when I got a new mouse and I wanted to change the scroll wheel settings. Thats when I noticed theres no such option in Unity / GNOME Control Center.

I searched for ways to change this under Linux and the easiest to use seems to be "imwheel", a command line tool that can be used to tweak the mouse wheel behavior and which, among others, can change the scroll speed of the mouse wheel, and I decided to share the information with you.

Heres what you need to do to change the scroll speed of the mouse wheel if your desktop environment doesnt have an option for this:

1. Install imwheel. Since the app is available in the official Ubuntu repositories, you can install using Synaptic, Ubuntu Software Center, etc. or use the following command to install it:
sudo apt-get install imwheel

2. Next, create a file called ".imwheelrc" in your home directory - Ill use Gedit in the command below to open this file:
gedit ~/.imwheelrc

And in this file, paste the following:
".*"
None, Up, Button4, 3
None, Down, Button5, 3
Control_L, Up, Control_L|Button4
Control_L, Down, Control_L|Button5
Shift_L, Up, Shift_L|Button4
Shift_L, Down, Shift_L|Button5

"3" at the end of lines two and three represent the number of lines to scroll ("3" should be default)  - modify this number to suit your needs. Once youre done, save the file.

The first (".*") line from the code used above represents is used to specify in which applications to use those settings. ".*" means everywhere, but you can also apply application-specific settings by changing ".*" to the window name (and add multiple application-dependent settings). Run "man imwheel" for more information.

And finally, the last 4 lines in the code above are there to allow Ctrl / Shift with mouse scroll wheel up / down to work (for instance, to allow zooming in on a webpage in the web browser, etc.), which is the default behaviour.

3. Start "imwheel" (type "imwheel" in a terminal). Important note: make sure you dont run multiple imwheel instances (if you want to stop any previous instances, run the following command: "killall imwheel")!

Also, if you have back / forward navigation buttons on your mouse, they will stop working using the configuration weve used above. In such cases, you should launch imwheel like this:
imwheel -b "4 5"
... and the back / forward buttons should work (thanks to biohazara for the tip!).

4. Since these settings are only applied when imwheel is running, you should add imwheel to startup (if you use Unity, to do this, open Startup Applications, click "Add" and under both "Name" and "Command" fields, add "imwheel"). Also, like I mentioned above, if you have back / forward mouse navigation buttons, use the following command instead of simply running "imwheel" or else those buttons wont work: imwheel -b "4 5"

Its important to mention that imwheel applies the settings available in ~/.imwheelrc when the application starts and it doesnt update when changing the configuration file. So if you modify the configuration file, youll need to close imwheel and start it again to apply / test the changes (you can close/kill it using the following command: "killall imwheel").

Notes:
  • this will most probably not fix issues such as very fast scrolling, if you encounter such an issue, you can try unplugging and then plugging the mouse back (from what Ive read, that seems to solve the issue in most cases);
  • if you only want to change the scroll wheel speed in Firefox and Chrome, you can do this from within the app or using an extension: Firefox | Chrome, etc.

via AskUbuntu; image via Wikipedia.


Available link for download
Read more »

Tuesday, February 14, 2017

How to Change Add themes in CodeBocks C C IDE

How to Change Add themes in CodeBocks C C IDE


In this video tutorial i will show you how to change the background theme in CodeBlocks IDE


Note-Theme Code link-https://docs.google.com/file/d/0B-nG6oJdQsyRVl83MGRDNkJLN1U/edit?pli=1

Enjoy this awesome trick...& for more tricks keep visiting this blog...:)


REGARDS
Shankha Jana


Available link for download

Read more »

Tuesday, February 7, 2017

How To Change Blogger Post URL Using Custom Permalink

How To Change Blogger Post URL Using Custom Permalink


blogger-seo-post-urlWhenever we publish a new post, Blogger automatically generates the post URL according to the title of the blog post. For example, if the post title is How To Change Blogger Post URL Using Permalink? then Blogger will generate http:// technoxide.blogspot.com /2012/07/ how-to-change -blogger-post- url-using.html as the post URL. If you want to change this URL to a small SEO friendly one here comes the solution.

Recently Blogger introduced an option named Permalink in Post settings to edit the post URL to your desired one. In this post I included the simple steps to use custom permalink in Blogger blog. Here are the steps.

Steps:
Note : If you have Permalink Option in your Blogger Post Settings Start from Step 2.

1. Open a post you wish to edit the URL or Create a New Post.
(If you are editing a published post, then click on Revert to draft button to enable Permalink editing.)

blogger-post-revert-to-draft

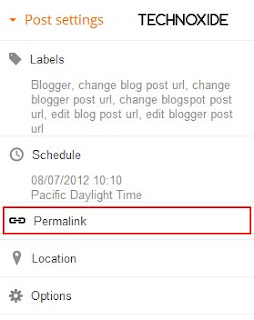
2. Then click Permalink in Post Settings.

permalink-option-blogger-draft

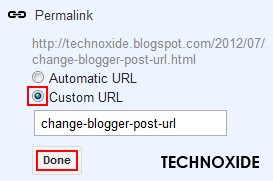
3. Now check the Custom URL radio button and type the new post URL in Custom URL text field. After changing the URL dont forget to click Done!

permalink-custom-url

4.Finally, Click Publish .

Thats it...Now check the post URL it will be changed to the modified one !

Note : If you are changing URL of a old post, please note down the old URL before changing to a new one. Because your old post URL may be submitted to search engine or social websites.So If any one come to your blog using the old URL he will get a 404 not found error. Dont Worry ! you can Redirect your old URL to new URL using Custom Redirects feature of Blogger.


Available link for download

Read more »

Tuesday, January 31, 2017

How to Change Theme in Samsung Galaxy Note 5 Guide

How to Change Theme in Samsung Galaxy Note 5 Guide


Hello, Friends If you have new Samsung Galaxy Note 5 and dont know how to change theme Samsung Galaxy Note 5.  You can change your Samsung Galaxy Note 5 theme and Customize home screen according to you. If you want change theme your latest Galaxy Note 5 then follow the simple steps.


Step : 1

Swipe down home screen notification panel.

Step : 2

Tap the Gear Setting icon.

Step : 3

Press on Themes

Step : 4

Select your favorite home screen theme.

Step : 5

Download selected theme and apply your home screen.

Follow above steps and change your Galaxy Note 5 theme. 

Incoming Search Terms:
Samsung Galaxy Note 5 Guide, Theme Change on Galaxy Note 5, Change Galaxy Note 5 interface, How to Change theme on Galaxy Note 5


Available link for download

Read more »

Saturday, January 28, 2017

How to Change your PC IP Address Free Hacks

How to Change your PC IP Address Free Hacks


Image result for pc ip address

For every country across the globe there are IP addresses and each state under each country also has specific IP addresses. This IP addresses are being used by many gadgets and devices that have internet facilities to providing information about your location to some servers, web applications, websites and to whoever needs the info for any reason.
Within this page, we reveal a simple hack and trick that will help you use a dynamic IP address of any country or state on your PC through your android device.

 This info is useful for those who wish to browse the internet without revealing their true identities for one reason or another. Aryk Enterprise does not provide this info to support thieft of any kind or illegal use therefore, your use of the info is at your own discretion.

By using this trick, you will be able to hide or disguise your true identities on the internet. Especially useful to browse and download from some websites that restrict some countries of the world from accessing there services and servers.
For example;
 You are a Nigerian who loves to buy goods and items online but have difficulties accessing some online stores or that you are restricted from certain services by these stores, you can just change your IP address using this trick.

How to Change your PC IP Address Using Android Device
For a long time now, TIME and DATE are being used to varifying the validity and security of a website just like the Longitude and Latitude are being used to calculating distances and time.

Some browsers or gadgets/devices would not even connect to the internet if your time and date, especially, DATE is not correct.

Android devices come with GPS, Location and Navigation services built-in and all the applications that connects and provide location services rely on the built-in GPS and Location programs of the android device.

Now, the good news is;
 Your android device GPS and Location programs also rely on your TIME ZONE

So, to change the IP address of your PC using your android device, you can now apply these understandings.Simply change your android device TIME ZONE

For example;
 You are a Nigerian and wish to change your IP Address to Canada, simply change your TIME ZONE to Athlantic (-3.00) and save the settings.

Once saved, everytime you connect to the internet, an IP would be chosen for you between all the regions that are within that time zone.

To change the Time Zone of your android device go to;
Menu <<>> Settings <<>> Time And Date <<>> Select Time Zone

If the Select Time Zone option does not appear clickable, simply unmark the Automatic Time Zone option, select your desired Time Zone then, remark Automatic Time Zoneback.

You can then connect your PC to the internet using your android device hotspot or viaUSB Tether. Either ways, the same address of the android device is used for the PC.

For any comments or questions over this article please, use the comment box below. And if your questions is not about this article and needs our help over something related,Find Us on Facebook. Got any other info you want us discuss? Share it with us using the comment box or contact us!to share this post
Sharing is lovely, Feel free to share this post


Available link for download

Read more »

Saturday, January 7, 2017

How to Change URL of Your Disapproved Adsense Site

How to Change URL of Your Disapproved Adsense Site


Adsense is the most popular and online advertisement program service powered by Google. This program helps to online content providers to earn money when visitor click on display targeted adsense ads. It is the share more revenue share to his publishers. It is the easiest way to earn money for webmasters and bloggers. But In this program most important part is adsense approved. Nowadays, Google Adsense is so difficult to approve. If your web site or blog complies with the adsense program policy, then your adsense account approved.

How to Change URL of Your Disapproved Adsense Site

Many bloggers and webmasters want to be approved by adsense account and try to approve. If you are also trying to adsense Approval and disapproved your adsense account. adsense is providing facilities to reapply for an adsense account. But the same web site URL to apply adsense account. If you want to change the url of your disapproval adsense account site then follow  instruction.

The Google Adsense program is not allowed to change the ongoing or disapproved website URL. You can only apply new adsense account via new gmail account or new website URL.


Available link for download

Read more »

Friday, December 30, 2016

How to change Computer icon without any software in windows 10

How to change Computer icon without any software in windows 10


Hello Everyone ! are you tired of old My computer icon in your desktop?? Me too! In this tutorial i will show you how to change My Computer icon without any software in Windows 10.

Lets begin!!  I think visual representation is better than anything.So, ive created a video tutorial for this.Watch the video given below,it shows detailed steps. Its very simple :)


Click here to subscribe my YouTube Channel.

--------------------
Regards
Shankha Jana


Available link for download

Read more »

Tuesday, December 20, 2016

How to Change My Computer icon without any 3rd party tool in Windows 8 1

How to Change My Computer icon without any 3rd party tool in Windows 8 1


Available link for download

Read more »

Friday, December 16, 2016

How To Change Hard Drive USB Drive Icon in Windows

How To Change Hard Drive USB Drive Icon in Windows


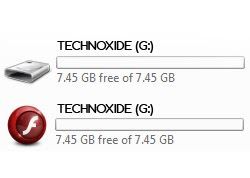
usb drive icon imageAre you bored of seeing the default Windows icon of hard drive or USB drive? Did you ever think about changing those icons? Then here is the solution for you.
This post describe a simple method to change the icon of your USB drive or hard drive to your favorite one.

Method:
1. Download your favorite icon file from the web or convert your favorite image to icon.
2. Open Notepad and write down the following code below in Notepad .

 [autorun] 
icon=iconname.ico

* In the above code iconname should be the name of your icon.

3. Now Click File > Save Or Ctrl+S to save the file.
4. Type File name: autorun.inf and change Save as type: All Files (*.*).

notepad save as type image

5. Click Save .
6. Now copy the saved autorun.inf file and your .ico file to the root directory of your USB drive or hard drive. For hard drive you have to restart the system to take effect the change and for USB drive just unplug and plug it back to see the change.

Thats it done !!!


Available link for download

Read more »

Monday, December 12, 2016

How to change file extension in Android

How to change file extension in Android


How to Rename ,Zip ,root files on Android 

How to change  file extension in Android phones 

how to find root directory on  android phones 


How to change file extension in Android phones. how to find root directory on android phones

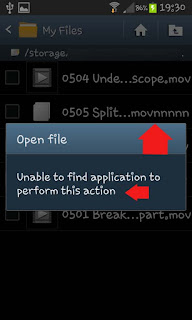
Sometimes it feel so annoying when you are trying to play or open a file and you got an answer , "unable to find application to perform this action"on Android smartphone. Android users will understand clearly what I mean . There is easy way to rename or change file extension in android with few easy steps. 
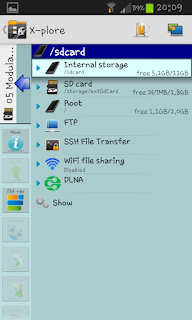
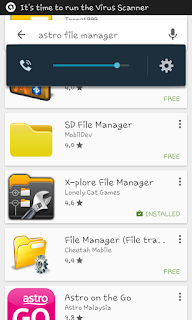
First of all you need to download any File Manager for android from Google Play Store. Open Google Playstore and search for file manager . you will have list of various file manager apps for android. For the reference I will use X-plore android app. 

How to change file extension in Android phones. how to find root directory on android phones

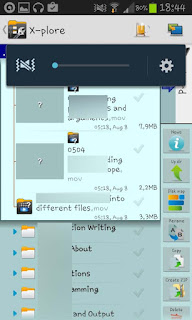
Open X-Plore android app , go to storage where file is saved . (Internal memory or SD Card or Root directory). If you are looking for root directory in android , you can also find it under the storage option in file manager app.

How to change file extension in Android phones. how to find root directory on android phones

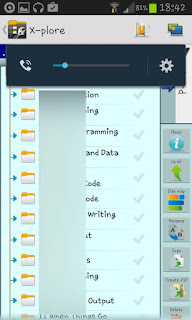
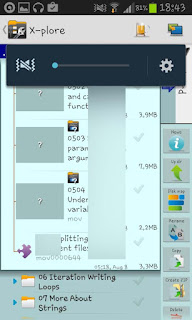
locate folder in which file or video is located .

How to change file extension in Android phones. how to find root directory on android phones

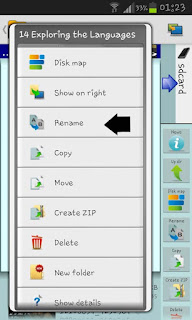
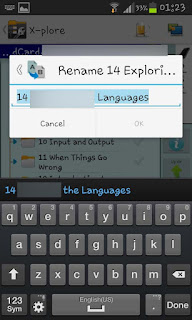
Got to file , Press and hold the file or video which you want to change extension or need to rename . A pop up box will be open , select Rename option . You can also use other option on this point like copy,move,create zip ,delete etc.


How to change file extension in Android phones. How to change file extension in Android phones. how to find root directory on android phones

Change the name of file or change the extension of any file . 


how to find root directory on android phones

You are done . Your files are ready to use. 


how to find root directory on android phones


All the logo , images and files are property of their respective owners. Android soldier does not claim any credit . 


Available link for download

Read more »

Wednesday, November 30, 2016

How To Change Blogger Static Page URL

How To Change Blogger Static Page URL


After publishing the post How To Change Blogger Post URL using Permalink? I got some mail and comment about changing the Blogger Static Page URL ! I didnt found any option given by Blogger for this purpose.

Like Blogger post , Page URL suddenly changed to match Page Title. After some Googling i got a simple solution to prevent changing the Blogger page URL match to page title.here it is.

Method:
1. In your Blogger dashboard Click Pages > New page > Blank page .


2. Now type the Page title as you want to show in the URL and click Publish. For example if you want to show about as your page URL,then you type about in the page title field.

3. Now revert back your blogger to Old Blogger interface.


4. Then click Edit Posts > Edit Pages.


5. Then click on Edit option of the page we recently created. In our example about.


6. Finally enter the Page Tile you wish to show in the page and click PUBLISH PAGE. In my casa I am typed About Technoxide.

Thats all ! Done !

Click here to Check my page URL i am created using this trick.


Available link for download

Read more »

Thursday, November 10, 2016

How to change EditText bottom line color in Android

How to change EditText bottom line color in Android


Hi guys ! In this tutorial i will show you how to change editText bottom line color.This can be done in two ways.The first way is the easy way and another way is little bit complex but it gives you more control over UI.
First the easy way-
 
android:backgroundTint="#ff1e0c"


The backgroundTint attribute will help you to add a tint(shade) to the background. You can provide a color value for the same in the form of - "#rgb", "#argb", "#rrggbb", or "#aarrggbb".

Second Way- In this method we will create an xml LayerDrawable which will be used as a background.
A LayerDrawable is a drawable object that manages an array of other drawables. Each drawable in the list is drawn in the order of the list—the last drawable in the list is drawn on top. Each drawable is represented by an element inside a single element.

The LayerList can be used to draw multiple other drawables (shapes, images, etc) and position them in relationship to one another. The layers are placed on top of one another by default with the last item being drawn on the top. Layers can then have their coordinates shifted using the left, right, top, and bottom properties.

activity_main.xml


<?xml version="1.0" encoding="utf-8"?>
<RelativeLayout >"http://schemas.android.com/apk/res/android"
>"http://schemas.android.com/tools"
android:layout_width="match_parent"
android:layout_height="match_parent"

tools:context="com.shankhajana.tutorial.MainActivity">

<EditText
android:id="@+id/input_name"
android:layout_width="match_parent"
android:layout_height="wrap_content"
android:layout_alignParentEnd="true"
android:layout_alignParentRight="true"
android:layout_alignParentTop="true"
android:layout_marginLeft="@dimen/activity_vertical_margin"
android:layout_marginRight="@dimen/activity_vertical_margin"
android:layout_marginTop="76dp"
android:background="@drawable/edittext_bg"
android:hint="Enter Your Name"
android:padding="10dp" />
<!--This is optional.Not required for this tutorial-->
<ImageView
android:id="@+id/imageView"
android:layout_width="match_parent"
android:layout_height="400dp"
android:layout_alignParentEnd="true"

android:layout_alignParentRight="true"
android:layout_marginTop="319dp"
android:src="@drawable/img" />
</RelativeLayout>
edittext_bg.xml
<?xml version="1.0" encoding="utf-8"?>
<layer-list >"http://schemas.android.com/apk/res/android">
<item>
<shape android:shape="rectangle">
<!-- Draw a 2dp width border around shape -->
<stroke
android:color="#ff1e0c"
android:width="2dp"
/>
</shape>
</item>
<!-- Overlap the left, top and right border using background color -->
<item
android:bottom="2dp"
>
<shape android:shape="rectangle">
<solid android:color="#fffbce"/>
</shape>
</item>
</layer-list>
Final Output-


Click here to subscribe my YouTube Channel.

--------------------
Regards
Shankha Jana


Available link for download

Read more »

Thursday, November 3, 2016

How To Change Icon in Samsung TouchWiz Launcher Flat Icons Included

How To Change Icon in Samsung TouchWiz Launcher Flat Icons Included


Even the TouchWiz UI comes as the default Launcher in Samsung Android mobiles, most of the users prefer to use third party home screen launchers like Go, Nova, Apex, Buz, etc. All of the mentioned third party launchers have the built in option to change theme, icon, etc. The TouchWiz UI may get more popularity if it has the inbuilt options to change theme and icons like those launchers.

In this post I included the steps to change TouchWiz UI icons in Samsung Android mobiles. To get work this method your device must be rooted and should be installed a custom recovery like CWM or TWRP.

Update:
This post is updated with WizIconizer apps method. Using WizIconizer you can change the icon pack without booting into any recovery. use the first method.

I have tested this method with Galaxy S3 and Galaxy Core, and works without any problem. Icons pack contains a set of flat icon extracted from other icon packs and some of them made by me. I will update the icon pack whenever I got time.


How To Change Samsung Touchwiz Launcher Icon?

Method1 [ Recommended ]
1. Download and Install WizIconizer - Download
2. Download and Extract FlatIcons_Technoxide.zip
3. Copy extracted apk and xml file anywhere in phones Internal or External storage.
4. Open WizIconizer
5. Long Press on the CSCAppResource.apk and tap on Apply.
6. On First time the asks for root permission tap Grand
7. Finally ... Tap on Restart Device !

Method 2 (With Custom recovery)
1. Download FlatIcons_Technoxide.zip
2. Copy to Internal or External storage.
3. Reboot to CWM or TWRP
4. Install the FlatIcons_Technoxide.zip
5. Finally reboot your device

Thats it..

Extra Download
Blue Wallpaper


Available link for download

Read more »

Wednesday, November 2, 2016

How To Change Ubuntu Default Root SU Password

How To Change Ubuntu Default Root SU Password


Comparing to Windows, Ubuntu has more restriction in the file system and other system settings. To change some root level configurations you need to enter root password. By default the Root account password is locked in Ubuntu. In this case you can either change the default root password or use sudo command to login as root user which is stored by default for 15 minutes. After that time, you will need to enter your password again.
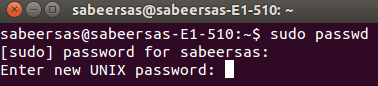
In this post I included the simple steps to change the default root su password in Ubuntu.

1. Open Terminal (Ctrl + Alt + T)
2. Type sudo passwd and press Enter ( enter sudo password )
3. Then you will be asked to Enter new UNIX password twice.

ubuntu default su password

Thats it .. Your Password Successfully changed.


Available link for download

Read more »

Monday, October 3, 2016

How To Change NotePad Default Shortcut Keys For Plugins Like Emmet Intent By Fold Etc

How To Change NotePad Default Shortcut Keys For Plugins Like Emmet Intent By Fold Etc


In Windows Platform, Notepad++ is the most popular code Editor among the developers. Its code highlighting available on a wide range of languages includes Java, PHP,HTML,CSS, XML, etc. The availability of wide range of plugins extends Notepad++ to the level of premium IDEs.
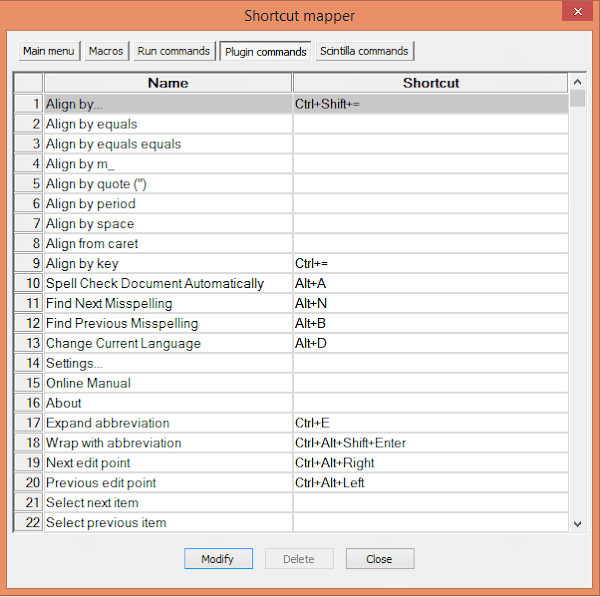
Shortcut keys will be more helpful when the keys are handy for the user. It depends by the user. Most of the popular Notepad++ plugins like Emmet, Indent By Fold, etc. has a default shortcut to execute the command. But many users like to change it to another hot-key which feels more comfortable for them.

Luckily in Notepad++ we have the option to change or assign new shortcut keys for the built-in Notepad++ commands and the third party plugin commands. In this post I included the simple steps to change the default shortcut keys in Notepad++ code editor.

Change Notepad++ Short cut Keys

1. Open Notepad++
2. Goto Settings -> Shortcut Mapper..
3. To change plugin shortcut click on Plugin Command tab


4. In the shortcut mapper window...double click on the desired command you wish to change or select the command and click Modify.

5. Modify to the desired one...
(For example, if You need Ctrl + E for Expand Abbreviation, then the selection will be like in the image below)


6. Finally, Click OK...Restart NotePad++. Thats it.


Available link for download

Read more »