Showing posts with label lenovo. Show all posts
Showing posts with label lenovo. Show all posts
Tuesday, April 4, 2017
Hard Reset Android LENOVO X3 To Remove PIN Password and Restore Factory Setting Guide
Hard Reset Android LENOVO X3 To Remove PIN Password and Restore Factory Setting Guide
Hard Reset Android LENOVO X3 To Remove PIN, Password and Restore Factory Setting [Guide].
Hard Reset LENOVO X3. This device Also known as Lenovo Vibe P1 Pro, And now guidebelajar will show you how to perform hard reset on LENOVO X3 smartphone. Perform Hard reset on android device will erase or deleted all data stored and App installed on internal phone memory, so you must backup all data before perform it.
LENOVO X3 is the smartphone released on December, 2015. with 5,5 Inchi IPS LCD capacitive touchscreen, 16M colors, work on Android OS, v5.1 (Lollipop) and supported with chipset Qualcomm MSM8992 Snapdragon 808, Processor Quad-core 1.2 GHz Cortex-A53 & Dual-core 1.8 GHz Cortex-A57, GPU Adreno 418, combined with 3 GB of RAM, 21 MP on primary camera and 8 MP on secondary camera.
Some People say that Hard reset process is call with master reset or factory reset. Many people asking why shoud we perform hard reset to our phone. The logical answer that can we say for this asking is :
- There are many bug on LENOVO X3.
- Because we will sell our LENOVO X3 Android phones.
- Because we want to restore LENOVO X3 to Default Factory Setting.
- Because we We want to remove all personal data and setting that was stored in LENOVO X3.device.
- We will give our LENOVO X3 away to some one else, and we dont want that one know everything about our secret data, so we have to erase all data before back up it.
- Our LENOVO X3 has been lagging and stuck on android logo, this call with bootloop
- We have forgotten on PIN or Patern Lock at LENOVO X3.
- LENOVO X3 has a persistent problem that cannot be solved
- and many other reason.
1st Methode. Hard Reset LENOVO X3 Using Menu :
- Make sure your batery is fully charged, Recomended you have 80% of battery capacity
- Then Backup your LENOVO X3. see this guide
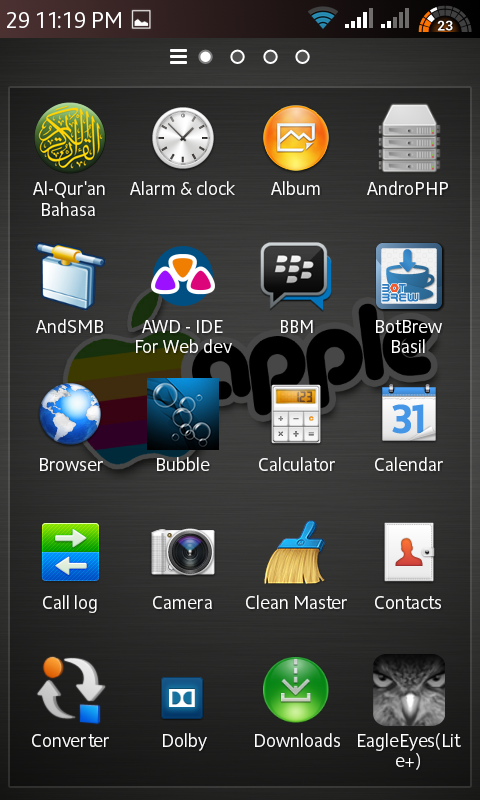
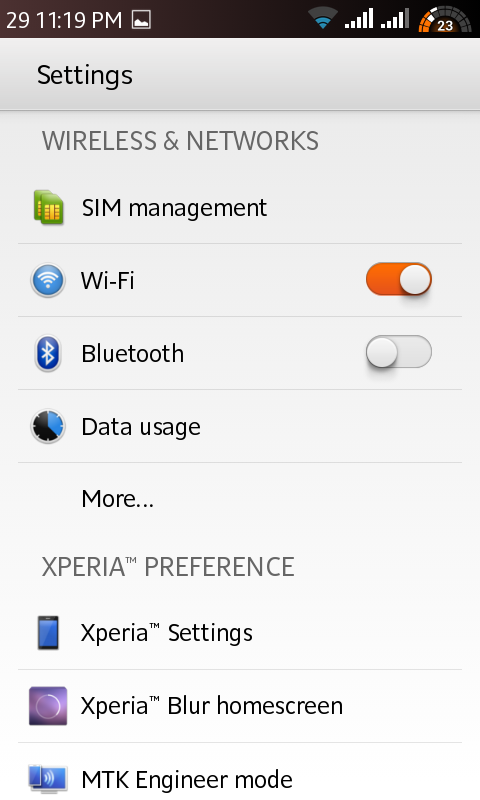
- Go to menu: System Setting >
- Select Backup and Reset >
- Factory Data Reset >
- Reset Phone
- Choose Erase everything to confirm that you already to perform hard reset on LENOVO X3
- LENOVO X3 will continue to hard reset process to restore factory default.
2ndMethode. Hard Reset LENOVO X3 Using Hardware Keys:
- Make sure your battery is fully charged, we recomended that your battery has 80% power
- Always BackUp your important data that store in LENOVO X3. see this guide
- Turn Off your LENOVO X3 by hold and press Power Button for a second.
- Release any SIM card and SD card that was installed on your LENOVO X3 smartphone.
- Then press and hold a combinatin key Power button + Volume Down.

Hard Reset Android LENOVO X3 - Release power button only when you see Lenovo Logo apear on screen.

lenovo Logo - Then release all button when your LENOVO X3 vibrate and enter recovery mode.

recovery mode lenovo x3 - Then Select Factory Reset.
- To navigate menu on this screen you can use volume up and volume down, then use power button to execute your selection.
- Then follow all instruction show on screen.
- Once finish, you can wait a while for LENOVO X3 to reboot system
- Done, your hard reset process success now.


Video Guide.
Available link for download
Sunday, March 5, 2017
How to Set Password on Lenovo Smartphone
How to Set Password on Lenovo Smartphone

This post mainly introduces the general approach to set a password on Lenovo smartphone step by step.
Step 1: Open Settings.
FYR, you can touch the bottom-left Menu Key and select Settings in the pop-up menu.
Step 2: Choose All settings on the top right corner.
Step 3: Locate and access Security.
Step 4: Click Screen lock to move on.
Step 5: Select Password from the options.
Step 6: Enter at least 4 characters to be a password and click Continue when done.
Step 7: Re-enter the password and tap OK to accomplish the setting task.
Related Articles:
Step 7: Re-enter the password and tap OK to accomplish the setting task.
Related Articles:
- Lenovo Android USB Drivers
- How to Set Password on Lenovo A850/A850+
- How to View Deleted Text Messages on Lenovo A-series Android
Available link for download
Wednesday, March 1, 2017
How to change rom Lenovo A316i to be Xperia Papyrus 2014
How to change rom Lenovo A316i to be Xperia Papyrus 2014

First, you must have done a root on the target phone, if still not rooted then you can read the article, how to root the phone china easily HERE.
Second, your mobile phone must be installed CWM recovery, if not you can read HERE.
Third, download the ROM xperia HERE, then after the download is complete,
place the xperia ROM on the sdcard and do not enter into the folder.
Fourth, reboot into CWM recovery menu, you can do it by :
1. Turn off HP, press the power button and volume up simultaneously and
hold until the boot selection menu appears on the HP, then select recovery.
2. Delete user data, cache partititon and Dalvik cache.
3. Select install.zip from sd card, select the ROM xperia.zip who have downloaded earlier, and
select install.
Wait until the process is completed and enjoy Lenovo A316i, with a sense of the Sony Xperia ;)
Look this Screenshot :


Thanks for coming and dont forget give this blog spirit from your like :)
Available link for download
Wednesday, January 18, 2017
How to root Lenovo Vibe K5
How to root Lenovo Vibe K5
If you own a Lenovo Vibe K5, you must be curious about getting root privileges on Lenovo. This guide will cover all the necessary steps which you need to follow to root Lenovo Vibe K5. Make sure you follow all the steps carefully so you don’t damage your phone.

Note: This guide will only cover Lenovo Vibe K5. So, I better suggest you do not try this guide on other device such Lenovo Vibe K5 Plus.
Precautions Before You Root Lenovo Vibe K5
There is nothing difficult about the rooting procedure, although you should know a few things before you root Lenovo vibe k5.
- By Rooting Lenovo K5, manufacturer’s warranty will be lost.
- If your device shuts down during the rooting process, your phone might be in brick mode.
- Rooting your phone will not affect your data but still it’s always better to make a backup.
Getting ready to root Lenovo Vibe K5
- Charge your device up to 80% minimum.
- Backup your Data e.g contacts, SMS and apps.
- You need to enable Developer Options on your phone in order to proceed with the tutorial. To enable developer options, follow the instructions below.
- Go to Settings in your phone. From there, find ‘about phone’ and click it. Then you will see Build Number. You should tap it seven times and developer options will be enabled on your device.
- Now it’s time to enable USB Debugging. Here is how to do it quickly.
- Tick the “USB Debugging” checkbox from the developer options from Settings
- Let’s enable “OEM unlock” now so that we can proceed to the next steps.
- Tick the “oem checkbox” from developer options
- Install driver ADB drivers for Lenovo
- Finally, you will need to download TWRP file so that you can install custom recovery on your phone.
Guide to install TWRP on your device and root Lenovo Vibe K5
Step 1: Unzip the TWRP file that you downloaded earlier. After unzipping, install the downloaded TWRP on your phone.
Step 2: Open the folder where you unzipped TWRP file and open CMD over there by right clicking on it.
Step 3: Connect your Lenovo K5 to your PC using a USB cable. Now you need to enter the following command and hit enter.
- “Fastboot reboot bootloader”
This command will turn your phone into fastboot mode.
Step 4: Now Flash TWRP recovery on your phone. You will need to enter the following command. Be sure to copy the command exactly as given but without quotes. Hit enter after entering the command.
- “fastboot flash recovery twrp-k5-3.0.2-r1_shreps.img”
Step 5: Reboot the pone to normal mode using the following command. You can also reboot into fastboot manually but let’s do it with a quick command here.
- “fastboot reboot” {Hit enter after entering the command. Your phone will reboot now}
Step 6: This is your final step to root Lenovo Vibe K5.
Copy the SuperSU file to your phone and restart the device into recovery mood by holding the the hardware button combination. Once in recovery mode, find ‘Install from ZIP’ option. Navigate to SuperSU file and wait for the flashing process to finish. Once it finishes, your phone will be rooted.
Congratulations you have successfully Rooted Lenovo Vibe K5. You can check it by downloading and installing root checker app from Google play store. This app will report your phone’s root status within a second.
Available link for download
Friday, December 16, 2016
How to Set Password on Lenovo A850 A850
How to Set Password on Lenovo A850 A850

You are able to set a password on your Lenovo A850/A850+ phone by following the steps below.
Step 1: Access Settings.
Step 2: Choose All settings.
Step 3: Enter Security & Screen lock.
Step 4: Choose Screen lock to go on.
Step 5: Select Password.
Step 6: Enter at least four characters to form the code and click Continue.
Note: There must be at least one letter in the password.
Step 7: Re-enter the password and tap OK to confirm it.
After these seven steps, the password has been created to protect your phone with success.
Related Articles:
After these seven steps, the password has been created to protect your phone with success.
Related Articles:
- Lenovo Android USB Drivers
- How to View Deleted Text Messages on Lenovo A-series Android
Available link for download
Friday, November 18, 2016
Guide How to Install TWRP Recovery and Root Android Lenovo Vibe K5 K5 Plus
Guide How to Install TWRP Recovery and Root Android Lenovo Vibe K5 K5 Plus
[Guide] How to Install TWRP Recovery and Root Android Lenovo Vibe K5 | K5 Plus.
Install TWRP Recovery and Root Vibe Lenovo K5. This guide will show you how to Install TWRP Recovery and Root Android Lenovo Vibe K5 | K5 Plus. If you want root the Lenovo Vibe K5 or K5 plus you must install TWRP Recovery first on this device. We know that TWRP is custom recovery image for Android-based devices, and this recovery provided GUI interface or with touchscreen enabled, by using TWRP we allows users to install third-party firmware and backup the current system. therefore, TWRP often installed when rooting Android smartphone devices.
Lenovo Vibe K5 is the smartphone released on February, 2016. with 5,0 Inchi IPS capacitive touchscreen, 16M colors, work on Android OS, v5.1 (Lollipop), and supported with Quad-core 1.5 GHz Cortex-A53 & quad-core 1.2 GHz Cortex-A53 CPU, Qualcomm MSM8929 Snapdragon 415 chipset, Adreno 405 GPU, combined with 2 GB of RAM, 13 MP on primary camera and 5 MP on secondary camera.
Lenovo Vibe K5 is the smartphone released on February, 2016. with 5,0 Inchi IPS capacitive touchscreen, 16M colors, work on Android OS, v5.1 (Lollipop), and supported with Quad-core 1.5 GHz Cortex-A53 & quad-core 1.2 GHz Cortex-A53 CPU, Qualcomm MSM8929 Snapdragon 415 chipset, Adreno 405 GPU, combined with 2 GB of RAM, 13 MP on primary camera and 5 MP on secondary camera.
Install TWRP on Lenovo Vibe K5.
Here is the guide started. Now follow all step carefully.
- Make sure Minimal ADB and fastboot installed on your compuer. you can see this guide.
- Make sure your battery is not empty or at least has 70% of battery capacity.
- Now, switch on your Lenovo Vibe K5.
- Then enable the Developer Options.
- Go to Setting -> About Phone -> Phone Information -> tap 7 times at Build Number,
- Then, Enable USB Debugging
- Go to Settings -> Developer -> USB Debugging
- Now, Enable OEM unlock.
- Go to Settings -> Developer -> Unlock OEM
- Make sure driver for Lenovo Vibe K5 installed correctly on your computer, you can find the driver that come on the CD cell partition
- Now, connect your Lenovo Vibe K5 to the computer using original USB cable.
- Then, Download the TWRP recovery, and copy it to the folder where adb is installed on your computer.
- Download link
- Cretaed by Shreps
- TWRP version : 3.0.2.0
- File name : twrp-k5-3.0.2-r1_shreps.img
- Open a command prompt from within your fastboot folder.
- To start this command prompt just hold shift + right click, select open command prompt here.

Run ADB on computer - Now type,
- adb devices
- This command used to confirm the connection between Lenovo Vibe K5 and the computer.
- Once the connection confirmed. Now type.
- adb reboot bootloader
- If you want to temporarily boot this recovery type ,
- fastboot boot TWRP-k5-3.0.2-r1_shreps.img
- If you want to permanently flash it, type ;
- fastboot flash recovery TWRP-k5-3.0.2-r1_shreps.img
- Finish.
Root on Lenovo Vibe K5.
- This step will show you how to root Lenovo Vibe K5
- To start it, you must Download the ZIP file SuperSU v2.46
- Then save it in the micro SD card.
- Now turn off your Lenovo Vibe K5.
- Then enter to recovery mode.
- Press and hold Power Button and Volume Up button
- Then follow instruction appear on screen.
- Select recovery to install SuperSu from SD Card.
Available link for download
Sunday, October 16, 2016
How to Enable TwoFingerTap as a Right Click in lenovo laptops Synaptic Touchpad Systems
How to Enable TwoFingerTap as a Right Click in lenovo laptops Synaptic Touchpad Systems
In some of the laptops which use synaptics touchpad drivers, the TwoFingerTap doesnt work as a right click.Even after enabling this option in the Synaptics Control panel doesnt fix this problem.In this tutorial you will learn how to fix this problem & enable TwoFingerTap as a RightClick on Lenovo laptops.Im Performing this in Lenovoz510 which is loaded with Windows 10 operating system.But this method will work for every laptop which uses synaptics touchpad Driver.This will also work in Windows 8.1 platforms.
2.Go to "HKEY_CURRENT_USERSoftwareSynapticsSynTPTouchPadPS2". If you dont find "TouchPadPS2" and another entry named "TouchPadSMB2c" exists under SynTP then click on "TouchPadSMB2c". If you dont find "SynTP" key then read note at end of the post.
3.On the right double click on "MultiFingerTapFlags" entry and update its value to 3.
4.On the right double click on "2FingerTapAction" entry and update its value to 2.
5. Press OK and Exit.
6. Restart your Laptop.
Note - If you dont find any of the above keys then you have to manually create it. Right Click on Synaptics click on New Key and Give it name ""SynTP". Now similarly create a key named "TouchPadPS2" under "SynTP". Now under "TouchPadPS2" create new "DWORD (32 bit) Value" with name "2FingerTapAction". Double Click it and Change its Value to 2. Logoff and Start Windows.
--------------------------------------------
.
Steps-
1.Press Win+R keys to open run, type regedit and hit enter to open Registry Editor.2.Go to "HKEY_CURRENT_USERSoftwareSynapticsSynTPTouchPadPS2". If you dont find "TouchPadPS2" and another entry named "TouchPadSMB2c" exists under SynTP then click on "TouchPadSMB2c". If you dont find "SynTP" key then read note at end of the post.
3.On the right double click on "MultiFingerTapFlags" entry and update its value to 3.
4.On the right double click on "2FingerTapAction" entry and update its value to 2.
5. Press OK and Exit.
6. Restart your Laptop.
Note - If you dont find any of the above keys then you have to manually create it. Right Click on Synaptics click on New Key and Give it name ""SynTP". Now similarly create a key named "TouchPadPS2" under "SynTP". Now under "TouchPadPS2" create new "DWORD (32 bit) Value" with name "2FingerTapAction". Double Click it and Change its Value to 2. Logoff and Start Windows.
--------------------------------------------
REGARDS
Shankha Jana
.
Available link for download
Subscribe to:
Posts (Atom)