Showing posts with label firmware. Show all posts

Monday, April 3, 2017

How to Flash Stock Firmware on Samsung Galaxy Devices

How to Flash Stock Firmware on Samsung Galaxy Devices


Stock-Rom-on-samsung-phone.jpg (734×677)


How to Flash Stock Firmware on Samsung Galaxy Devices


Samsung phones are notoriously known for the lag issue on its TouchWiz interface. However, one cannot deny the fact that despite their minor and major drawbacks of their phones, Samsung is still the most popular OEM of smartphones. One of the reasons why Samsung Galaxy devices are popular among users is the ease with which we can find the official firmware for our phones and install them using their Odin tool.
If you got a Samsung phone or tablet and are having software based issues, you can easily restore the stock firmware on it and fix it yourself. Flashing a Samsung device is easier than most Android phones. This is because Samsung provides their own software that can be used to flash all their phone models (Samsung Kies). By using the unofficially released Odin tool, the flashing process becomes easier and smoother as compared to Kies.
The process described below is for flashing any Samsung device back to the original operating system (ROM) and/or for upgrading to any higher or a lesser version of Android version.

Disclaimer/Warning!

This tutorial is only for Samsung Android smartphones and tablets. While we have taken utmost care in describing the procedure in a detailed way, the user must be extra careful with selecting the correct firmware file to install it succesfully. If you have any doubts regarding the procedure, we suggest you to drop us a comment below to clear the same.
Flashing the stock firmwares do not void your device’s warranty or trip KNOX Warranty counter. However, if you flash CF-Auto-Root packages or a custom recovery using Odin, doing so will void the warranty. Just follow the tutorial to the word carefully and everything will go fine hopefully. Technastic will not be responsible for any damages caused to your device.

Preparations

Charge Your Device

Before you proceed to install the firmware on your Samsung device, it’s important that your device has sufficient battery juice left on it. In case the battery turns off during firmware flashing, your phone be hard-bricked. To avoid any unpleasant experience, make sure your device has 60-70% battery power at least.
battery-status-samsung-galaxy-s6

Enable Developer options and USB Debugging

To install a firmware successfully, you must enable USB Debugging on your phone and tablet. You can find this option under Developer Options. If you don’t find it under Settings, here’s is how you can enable it:
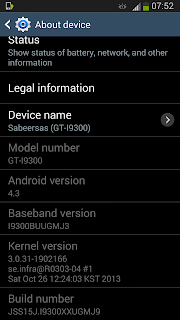
  • Open Settings and go to About Device.
  • Scroll down to Build number and tap it 7 times.
  • You will see a toast message that “Developer mode has been enabled” on your device.galaxy-s6-developer-options
  • Now go back to Settings panel and scroll down to Developer options.
  • Tap it and check the box for USB debugging option to enable it.
galaxy-s6-usb-debugging

Install the Latest Samsung USB Drivers

Install the latest Samsung USB drivers on your PC. If you already have them installed on your computer, you can skip this step.omputer. If you have Kies on your computer, make sure that the program is closed while you use Odin. You can download the Samsung USB Drivers from google search.

Backup the Apps and Important Data

It’s very important that you take a backup of all your apps, images, videos, messages, memos, and other important data present on your device before installing a new firmware. Usually, new firmwares don’t wipe any data, but you should still take precautions. You can find hundreds of useful backup apps at the Google Play Store to help you with the job.

Download Odin Flashing Tool

Now download the recommended Odin tool for flashing firmware on your Samsung device. As you know that there are several Odin versions available but considering the rate of success, you should use Odin3 v3.09 (for JellyBean and KitKat), or Odin3 v3.10.7, (for Lollipop and Marshmallow).

Download the Stock Firmware for Your Samsung Device

While downloading the stock firmware for your device, make sure you download the correct file for your device model. You can check the model by going to Settings> About. You can download the firmware from Samsung-Updates or Sammobile.

Reboot Your Samsung Galaxy Phone/Tab into the Download Mode

To install a stock firmware, or any .tar file, you will have to reboot your Samsung device into the Download or Odin Mode. You can easily access the Download Mode as follows: Turn off your device and then press and hold
Turn off your device. Now press and hold Volume UP+Home+Power buttons at the same time for about 2-3 seconds.
samsung-download-mode
When you see the warning screen with a yellow triangle sign, press the Volume Up key to enter Download/Odin mode:samsung-download-mode-2
After pressing the Volume Up key, you device will get into the Odin or Download mode.
samsung-download-mode-1

Flash Stock Firmware on Samsung Galaxy Using Odin

  1. If the firmware/CF-Root/custom recovery file you downloaded is a zip file, extract it to get the file with .tar or .tar.md5 extension.
  2. Extract the Odin zip file too, and launch the program by clicking the Odin3 vx.xx.exe file.
  3. Now turn off your device and reboot it into the Download Mode.
  4. Connect your device to the computer using a compatible USB cable.
  5. When your device is detected by Odin, the ID: COM port on Odin will turnBlue or Yellow depending on the Odin version and you’ll see “Added!!”message in the message box in Odin.Odin-pc-connection
  6. In case your phone is not detected by Odin, try the following things:
    • Reboot your phone and turn it off.
    • Disable and enable USB Debugging again.
    • Uninstall Samsung USB Driver or Kies and reinstall it.
    • Reboot your PC.
    • Use a different USB port.
    • Try a different USB cable, preferably the one provided with your device.
  7. Click the AP or PDA button on Odin.
    • Single firmware file installation: Navigate to the firmware or recovery file and select the file with .tar/.tar.md5 extension.flashing-samsung--firmware-with-odin
    • Multi-file firmware installation: In case you have to install a multi-file firmware with AP, BL (bootloader), CP (modem), CSC, and .PIT files, you must add the firmware components to corresponding slots in Odin like shown below. If you don’t have the .PIT file for your device, click here to download or request it. Below is an example of Odin configuration while flashing a multifile firmware.multifile-firmware-installation-odin
  8. In the Option section, make sure that only the Auto Reboot and F. Reset Time boxes are checked and everything else are unchecked.
  9. Having made sure that everything looks fine (as shown in the screenshots above), just click the Start button on Odin to initiate the firmware installation.
  10. Available link for download

Read more »

Monday, March 27, 2017

Guide Download LG G3 LG AS990 BRIGHTPOINT KDZ Firmware And Flash Using LG Flash Tool KDZ method

Guide Download LG G3 LG AS990 BRIGHTPOINT KDZ Firmware And Flash Using LG Flash Tool KDZ method


[Guide] Download LG G3 (LG AS990 BRIGHTPOINT) KDZ Firmware And Flash Using LG Flash Tool (KDZ method).

Flash LG G3 (LG AS990 BRIGHTPOINT). LG G3 (LG AS990 BRIGHTPOINT)  is the android smartphone which announced in July 2014, and exactly released on 2014, July. On this post you can download LG G3 (LG AS990 BRIGHTPOINT) KDZ Firmware file, And guidebelajar on this guide will explain to you how to flashing android device on LG G3 (LG AS990 BRIGHTPOINT) to repair a bootloop or uprade system.

This LG G3 (LG AS990 BRIGHTPOINT) is the smartphone with 5,5 Inchi True HD-IPS + LCD capacitive touchscreen, 16M colors, work on Android OS, v4.4.2 (KitKat), upgradable to v6.0 (Marshmallow) and supported with Quad-core 2.5 GHz Krait 400 CPU, Qualcomm MSM8975AC Snapdragon 801 Chipset, combined with 3 GB of RAM and 13 MP of  Main camera and 2,1 MP on secondary camera. 

Now, follow the instruction list bellow, do it with your own risk.

Requirement Tool For Flash LG G3 (LG AS990 BRIGHTPOINT) .

Before you perform flash or install your firmware on LG G3 (LG AS990 BRIGHTPOINT) ,
you must download all requirement tool below ;
  1. Download Stock Rom LG G3 (LG AS990 BRIGHTPOINT).
    • This Stock is KDZ file, remember to copy this KDZ file into LG Flash Tool 2014 folder
    • Check the firmware that match with your phone version, for , below
    • LG KDZ Firmware
      No.
      Model
      Suffix
      Version
      Buyer  
      Buyer Name
      Download
      1.
      LG AS990
      ABPTTN
      AS99021A_00
      BPT
      BRIGHTPOINT
      2.
      LG AS990
      ABPTTN
      AS99020A_01
      BPT
      BRIGHTPOINT
    • Download Driver LG: Here
    • Latest LG FlashTool : Here

    #1. Guide To Flash LG G3 (LG AS990 BRIGHTPOINT)

    Please follow this guide carefully to flash LG G3 (LG AS990 BRIGHTPOINT) .
    1. Make sure you have download all requirement tool above
    2. Then Install the drivers with your phone connected with your Computer, when it finished disconnect your LG G3 (LG AS990 BRIGHTPOINT) phone from your computer.
    3. Now turn your LG G3 (LG AS990 BRIGHTPOINT) phone off, then continuously click on the volume up button and connect your phone to your PC, 
    4. Now, enter your LG G3 (LG AS990 BRIGHTPOINT) into download mode.  ( visit this guide or see at the end of this post)
    5. Run LGFlashTool2014.exe.
    6. If you cannot run LGFlashToo2014.exe, You must install Visual C++ Runtime Library, get here
    7. There are two options to flash your LG G3 (LG AS990 BRIGHTPOINT) .
      • Normal Flash : You can select this option if you want Flash ROM without losing any data. Only use this when you need to fix system error.
      • CSE Flash : You can choose this option when you need a fresh format. All data will be deleted. Its suitable for upgrading or downgrading ROM or simply use this when you need to back to Stock. 
        LG flash tool normal flash / CSE flash
        LG flash tool normal flash / CSE flash
    8. Select Type: CDMA
    9. PhoneMode: DIAG
    10. Select KDZ file : browse your KDZ file in your drive
    11. Then you can Click on Normal Flash or CSE Flash (see step 7 to decide this option)
    12. Then click Start.
      LG flash tool - start
      LG flash tool - start
    13. Then click on Clear Phone Software update registry.
      Lg flash tool - Clear Phone Software update registry.
      Lg flash tool - Clear Phone Software update registry.
    14. No need to choose desired language, it automatically change to English as a default setting.
    15. Finally you can click OK.
    16. You must wait a minute for the LG Mobile Support tool to recognize the LG G3 (LG AS990 BRIGHTPOINT)  device.
    17. When you wait this process, may take 5 minute the tool to recognize it.
    18. The software will start the extraction on your device.
    19. When the process reach 100% your LG G3 (LG AS990 BRIGHTPOINT)  will reboot.
    20. Then, you must Unplug your LG G3 (LG AS990 BRIGHTPOINT)  from your computer by remove USB Cable from it.,
    21. Finish,

    #2. Guide To Flash LG G3 (LG AS990 BRIGHTPOINT)

    If #1 method is failed to flash your LG Android device, you can use this second method, flashing LG device using R&D Test Tool

    Enter LG G3 (LG AS990 BRIGHTPOINT) To Download Mode.

    To enter LG LG G3 (LG AS990 BRIGHTPOINT) in download mode, you can follow this guide :
    1. Remove battery from your phone
    2. Plug USB cable to your PC
    3. Press and Hold volume UP Button, while cable plugs USB Cable from PC to your Phone
    4. Then will appear white note on your LG G3 (LG AS990 BRIGHTPOINT)  phone, if you see this you can releasa Volume UP button.
    5. Press and hold volume UP Button on your LG G3 (LG AS990 BRIGHTPOINT)  phone again, until you see FIRMWARE UPDATE message.
    6. If your phone has been detected in your PC (to make sure, click the monitor icon beside Read Phone Information button, this action will open device manager windows. If your phone was detected you can see this at the top)
    7. Click START, and you will see dialogue box, just click OK
    8. Wait for the flash process, it will run in approximately 5 minute and your LG G3 (LG AS990 BRIGHTPOINT)  will restart itself
    9. Then your LG G3 (LG AS990 BRIGHTPOINT)  phone will boot up, if you can see Welcome Screen, its mean Flashing process is successfully.
    10. Unplug USB cable, and finish
    11. Now your LG G3 (LG AS990 BRIGHTPOINT)  is installed new firmware.


      Available link for download

      Read more »

      Saturday, February 18, 2017

      GOMAX Infinite G66 firmware 100 tested

      GOMAX Infinite G66 firmware 100 tested


      GOMAX Infinite-G66 firmware 100% tested

      GOMAX G66 firmware

      MT6572_Infinite-G66_98056C_Infinite-G66_WCDMA_5.0_QHD_20140919


       Connecting...
       Connection Done.
       Read CPU Info...
       CPU_ID: 6572
       CPU_SW: 0000
       CPU_HW: CA01
       uploading boot image to RAM...
       Handshake received from Phone.
       Detected eMMC FlashType.
       uploading boot image to RAM...
       Handshake Received from Phone.
       eMMC cid: 110100303034473930
       CHIP     : MT65720000
       CPU ID   :
       EMMC ID  : 110100303034473930
       EMMC Size: 4GB,  usable capacity: 3.69GB
       EMMC Name: eMMC_Toshiba_TYD0FH221618RA
       Read Hardware Information is done.

       Reading Project Property ...
       done.
       Making dir: C:UsersshuhanDesktopNew folderMT6572_Infinite-G66_98056C_Infinite-G66_WCDMA_5.0_QHD_20140919_20160609_154418...[ok]
       Reading preloader ......ok
       New EMI config is detected, auto added it to User Database, cnt=1
       Saved to: C:CS-ToolCST_MainSoftwareprivatedbemi
       Reading mbr ......ok
       Reading ebr1 ......ok
       Reading nvram ......ok
       Reading uboot ......ok
       Reading bootimg ......ok
       Reading recovery ......ok
       Reading sec_ro ......ok
       Reading logo ......ok
       Reading android ......ok
       Reading cache ......ok
       Reading usrdata ......ok
       Reading fat ......ok
       All done.
       Files saved to: C:UsersshuhanDesktopNew folderMT6572_Infinite-G66_98056C_Infinite-G66_WCDMA_5.0_QHD_20140919_20160609_154418


      https://drive.google.com/open?id=0B2tJf3FteNrRUGVFa0o0WEdISlU


      GOMAX Infinite-G66 firmware 100% tested

      Make Money Online : http://ow.ly/KNICZ


      Available link for download

      Read more »

      Monday, January 30, 2017

      How to easily update firmware via OTA on Leagoo Z1 smartphone

      How to easily update firmware via OTA on Leagoo Z1 smartphone


      A few days ago the Leagoo Z1 smartphone users received a new OTA update, which is very good news, it means that the developers team working hard to offer to the users the best experience. Here you can read about the Leagoo Z1 smartphone First Impressions & Quick Review andd here about the unboxing of this device.

       
      Firmware details
      OTA? LEAGOO_Z1_OS_1.1_Lite_A_20160517
      Size: 17.80 MB
      Firmware: Android Lollipop 5.1 OTA update
      Image: update.zip
      Model:  Leagoo Z1 smartphone
      Platform: Mediatek MT6580
      Old build number: LEAGOO Z1_OS 1.1 Lite A 20160513
      New build number: LEAGOO Z1_OS 1.1 Lite A 20160517


      Change log
      1. Fixed bugs and improved device performance.


      Install Guide
      Search the new OTA update firmware from Settings menu, download it and install it. The device will reboot and enter into Recovery Mode. The whole process will take a few minutes, please make sure the battery power is enough.


      Caution: Please do not update firmware unless you know what you are doing, you really want it or it is absolutely necessary. Firmware updates may occasionally have bad results, like bricking your device, temporarily or permanently. The firmware update process is done entirely at your own risk. Before attempting to update the firmware, back up your data.


      Don’t miss any of our future video tutorials, follow us on Youtube. Like us on Facebook. Add us in your circles on Google+. Watch our photo albums on Flickr. Subscribe now to our newsletter. Biggest firmware download center.


      Available link for download

      Read more »

      Wednesday, December 28, 2016

      How To Manually Update Galaxy S3 GT I9300 to Android 4 3 Leaked firmware

      How To Manually Update Galaxy S3 GT I9300 to Android 4 3 Leaked firmware


      galaxy s3 android 4.3 leaked firmware
      After Galaxy Note 2 Android 4.3 leak, now 4.3 leak is arrived to Samsung Galaxy S3 I9300 International version. It is not the official release, it is a pre build release. Unfortunately this prebuild is not implemented the KNOX features,S4 weather widget,Smart Stay etc. hope it may be available in Galaxy S3 official Android 4.3 release. This prebuild may have bugs as it is not the official release.

      Follow the steps below to manually flash the Galaxy S3 Android 4.3 leaked firmware using Odin 3.09.

      Firmware Info:

      Model: GT-I9300
      Country: Germany (Vodafone)
      Version: Android 4.3
      Changelist: 1902166
      Build date: Sat, 26 Oct 2013 12:24:03 +0000
      Product Code: VFG
      PDA: I9300XXUGMJ9
      CSC: I9300VFGGMJ5
      MODEM: I9300BUUGMJ3


      Note:
      - This firmware is only for Galaxy S3 International version (GT-I9300)
      - Backup all important data
      - Battery must be 60% or above
      - Kill all the kies processes in Task Manager
      - Disable Antivirus

      Update:
      This leaked version have an annoying deepsleep issue...so better dont flash it. Official 4.3 firmware from Samsung started rolling out yesterday. so wait for that official version for your country.

      Update 2:
      Samsung Galaxy S3 Official Stock Android 4.3 update started rolling out click the below link to the Official firmware post.

      Galaxy S3 GT-I9300 Official Stock Android 4.3 Update Using Odin


      Available link for download

      Read more »

      Saturday, December 24, 2016

      How to Install Firmware in Corby

      How to Install Firmware in Corby


      How to Install Firmware in Corby 2 ( Samsung GTS850 )
      At last, finally done. I hope that this tutorial will help you even though I wasnt able to do a demonstration with my corby 2 ( Samsung USB Cable was missing ). Perhaps, there are example images which will guide you through the tutorial. 
      * Extra Tags
      * Corby 2 Firmware Tutorial
      * Corby 2 Firmware Installation Tutorial
      * Samsung GTS3850 Firmware Tutorial
      * How to Install Firmware in Corby 2
      * How to Install Firmware in Samsung GTS3850
      * How to Download Firmware in Corby 2

      The Video above shows how to Download Firmware in Corby 2 ( Samsung GTS3850 ) Featuring Android Jelly Bean Firmware. The next tutorial will be all about installing Fonts in Corby 2. Stay tuned Corby People !

      The video was originally made via Windows Movie Maker. All rights goes to Corby Society.


      Available link for download

      Read more »

      Wednesday, December 14, 2016

      How to Install Firmware in Corby 2

      How to Install Firmware in Corby 2


      In this section, you are going to know how to install Firmware in Corby 2. Before we proceed, let us know first the definition of firmware and its possible outcomes.
      What is firmware ? Firmware is a permanent software programmed into a read-only memory . ( According to Google )
      Many of you are thinking that once we install a new firmware ( Android, for example ) the Operating system will be changed to Android. NO! Thats totally wrong, as what i had observed,most of the time, it is just the homescreen or other limited feauters that will be changed similar to ANDROID.You cant have Android games, because they are totally different.
      Now before we begin, let us know first what are the things needed

      * ( Software ) Multiloader v5.65 : 
         Dowload here http://adf.ly/iG8il
         ( If link wont work, try searching on Google )
      * ( Software ) Firmware 
         ( Download any from the blog )
      * ( Software ) Samsung USB Driver ( Recommended )
         Download here: http://adf.ly/QhzLw
      * Samsung USB Cable / Cord for Corby 2
      * Samsung Corby 2 

      ( You must have all the things needed above )

      Step by step guide:

      1. Install Samsung USB Driver.

      2. Turn off your phone and set in into DOWNLOAD MODE.
          ( Get your memory card and Sim card )
          How to set your phone into DOWNLOAD MODE?
          ( Press & Hold volume down+Lock Screen+ Call button )

      3. Plug your phone on your computer using Samsung USB Cable / Cord.
       ( NOTE: Memory Card wont work , you need to use this method )
      Check if your device has been successfully installed.
      For Windows 7 users:
      Start->run->type "device manager"
      Under Network, check if your device is there.
      If its not there, install Samsung USB Driver.

      For Windows XP users:
      Start->control panel->Performance and maintenance->System->Hardware->device manager.
      Under network,check if your device is there.
      If its not there,install Samsung USB Driver.

      4. Open Multiloader and click rsrc1 ( NOTE: It depends on
      the firmware if what type. You must see the format of the firmware that you have downloaded if it is an Rsrc1, Rsrc2 or etc. )
      Now inject the firmware that you have downloaded.


      5. Now click PORT SEARCH and then DOWNLOAD.
         Wait until your phone will reboot. Now your done.
         ( if you are not able to click the download button, then go back to step 4 )

      If you have questions / clarifications, please leave a comment.


      Available link for download

      Read more »

      Friday, December 9, 2016

      Hot! Download latest Android Marshmallow 6 0 1 stock firmware for N106 tablet

      Hot! Download latest Android Marshmallow 6 0 1 stock firmware for N106 tablet


      Download latest Android Marshmallow 6.0.1 stock firmware for N106 tablet from here or from here.

        
      Firmware details
      Archive? A83T_N106_N1061L6BC_20160309-ok
      Image: A83T_N106_N1061L6BC_20160309-ok.img
      Model: N106 tablet
      Firmware:  Android Marshmallow 6.0.1 stock
      Archive size: 254 MB
      Platform: Allwinner A83T octa-core
      Build number: A83T_N106_N1061L6BC.20160309 / octopus_ibt-eng 6.0.1 MMB29M 20160309 test-keys
      FW version: v6.0rc4_20160307

      Style: N1061L6BC
      Company: Inet
      Pixels: 800 x 1280


      Caution: Please do not update firmware unless you know what you are doing, you really want it or it is absolutely necessary. Firmware updates may occasionally have bad results, like bricking your device, temporarily or permanently. The firmware update process is done entirely at your own risk. Before attempting to update the firmware, back up your data. 
       

      Don’t miss any of our future video tutorials, follow us on Youtube. Like us on Facebook. Add us in your circles on Google+. Watch our photo albums on Flickr. Subscribe now to our newsletter.
      Biggest firmware download center.


      Available link for download

      Read more »

      Tuesday, December 6, 2016

      Gemei G6 Tablet PC Andoind Driver Firmware

      Gemei G6 Tablet PC Andoind Driver Firmware


      [Firmware Download] 

      Date: 2012-10-10   G6    Version?v2.34.004

      Details      Download


      [Firmware Download] 

      Date: 2012-8-21   G6    Version?0718????

      Details      Download


      [Firmware Download] 

      Date: 2012-9-10   G6    Version?V2.31.00??

      Details      Download


      [Firmware Download] 

      Date: 2012-9-14   G9T?G6?G9?G9TM    Version?V1.0

      Details      Download


      Available link for download

      Read more »

      Tuesday, November 29, 2016

      Guide Flash Update Firmware Samsung GALAXY S7 EDGE SM G935F Using ODIN v3 11 1

      Guide Flash Update Firmware Samsung GALAXY S7 EDGE SM G935F Using ODIN v3 11 1


      [Guide] Flash / Update Firmware Samsung GALAXY S7 EDGE SM-G935F Using ODIN v3.11.1.

      Flash Stock Firmware On Samsung GALAXY S7 EDGE SM-G935F. This guide show you how to flash a stock ROM on Samsung GALAXY S7 EDGE SM-G935F using Odin V3.11.1 software. Before you decide to use this guide, we recommend using Samsung’s own utilities, Samsung Kies and OTA (Over-the-air). Only use this guide if you are 100% sure about the risks involved in flashing your device. guidebelajar is not responsible for any damage caused by following this guide.

      This Samsung android device is released on 2016, March. and available on USA, Global and Southeast  Asia. Samsung GALAXY S7 EDGE SM-G935F is the smartphone with 5,1 Inchi Super AMOLED capacitive touchscreen, 16M colors, work on Android OS, v6.0 (Marshmallow), with Quad-core 1.8 GHz CDual-core 2.15 GHz Kryo & dual-core 1.6 GHz Kryo CPU, Qualcomm MSM8996 Snapdragon 820 chipset, Adreno 530 GPU, combined with 4 GB of RAM and 12 MP of  Main camera and 5 MP on secondary camera. 

      Flashing process in android Smartphone is like reinstall process on windows computer PC, with flash your Samsung GALAXY S7 EDGE SM-G935F android device you can unbrick, downgrade, manually upgrade (instead of updating via OTA or Samsung Smart Switch), or restore Samsungs stock firmware instead of custom ROM. I make this guide just for you as user all Samsung GALAXY S7 EDGE SM-G935F variant.

      You need to read this guide carefully, so you can get the best result flashing on your Samsung GALAXY S7 EDGE SM-G935F. Cause you need to download necessary file, you must ensure that you have good internet connection in your computer device, this guide using a windows computer.

      Initial Step To Flash Samsung GALAXY S7 EDGE SM-G935F 

      Now, we have reached on beginning guide, so you must to do initial step to ensure everything run smoothly.
      1. Make sure your Samsung GALAXY S7 EDGE SM-G935F battery is not in a low battery state, a minimum of 80%. If the battery runs out in the middle of the Root, it can lead to failure
      2. Always perform backup your important data before flashing process, Cause this process will delete or erase the data in memory.
      3. Make sure you have installed a Latest of Driver Samsung  that support with your Smartphone, If you dont have, please download here
      4. Original USB cable driver for your Samsung GALAXY S7 EDGE SM-G935F
      5. Download Samsung Smart Switch, Here
      6. Download Odin V3.11.1, Here
      7. Download Official firmware file for the model number of your device, download it from - SamMobile, or you can visit the other site, Here

      Main Guide To Flash Samsung GALAXY S7 EDGE SM-G935F 

      1. You must download all necessary file.(Samsung USB driver or Smart Switch and Odin)
      2. Then you must install all driver or samsung smart switch to your computer or PC.
      3. Extraxt Odin V3.11.1. file on the destination folder.
      4. To download Samsung firmware you must visit this link, you can download specific firmware file for your device model number. you must Log In with your registered account on this website.
        sammobile website Log In
        sammobile website Log In
      5. On the row menu at the top of page, you can select firmware.
        sammobile website GALAXY S7 EDGE SM-G935F
        sammobile website GALAXY S7 EDGE SM-G935F
      6. Then you must enter in search bar with your phone model number.
        Firmware Samsung GALAXY S7 EDGE SM-G935F
        Firmware Samsung GALAXY S7 EDGE SM-G935F
      7. Then select your country/carrier.
        select country or carrier for samsung firmware
        select country or carrier for samsung firmware
      8. Then you click on available country link.
      9. For Non-Premium member you can Select regular download.
        sammobile download non premium member
        sammobile download non premium member
      10. And Donwload button again. Approximately file size is 1,9 GB
      11. Wait untill your file finish downloaded, after that you must extract all firmware file on specific folder on your computer.
      12. This is your file.
        Flash Stock Firmware On Samsung GALAXY S7 EDGE SM-G935F
        Flash Stock Firmware On Samsung GALAXY S7 EDGE SM-G935F
      13. Switch Off your Samsung GALAXY S7 EDGE SM-G935F to start flashing process.
      14. Then, you must run Odin3 v3.11.1 by right click on Odin.exe and select Run as Administrator.
        Flash Stock Firmware On Samsung GALAXY S7 EDGE SM-G935F
        Flash Stock Firmware On Samsung GALAXY S7 EDGE SM-G935F
      15. When program is running, now you can click AP, and navigate to the *.tar or *.tar.md5 firmware file. 
        Flash Stock Firmware On Samsung GALAXY S7 EDGE SM-G935F
        Flash Stock Firmware On Samsung GALAXY S7 EDGE SM-G935F
      16. Now your firmware file has been inserted in Odin3 
        Flash Stock Firmware On Samsung GALAXY S7 EDGE SM-G935F
        Flash Stock Firmware On Samsung GALAXY S7 EDGE SM-G935F
      17. Then, Enter download mode your Samsung GALAXY S7 EDGE SM-G935F by pressing and hold Volume Down Button + Home Button + Power Button. Hold and press all button untill your phone vibrate and LCD show menu.
        download mode Samsung GALAXY S7 EDGE SM-G935F
        download mode Samsung GALAXY S7 EDGE SM-G935F
      18. And you will see picture like this on your LCD screen.
      19. Download Mode GALAXY S7 EDGE SM-G935F
        Download Mode GALAXY S7 EDGE SM-G935F
      20. On this mode, now you must connect your Samsung GALAXY S7 EDGE SM-G935F to your PC / laptop using a USB cable. 
      21. After your phone connected, you will see a message appear that show your device added and there is info on the ID: COM at top left corner. Keep in mind for this COM vary depending on the PC / Laptop. Just Ignore all, in this picture you will see that your device is detected on (COM 5)
        Enter download mode samsung GALAXY S7 EDGE SM-G935F
        Port Com samsung GALAXY S7 EDGE SM-G935F
      22. Make sure re-partition is NOT ticked
      23. When everything already you can click Start Button. at the bottom left corner
      24. Just wait for the process to run about 2-5 minutes, and make sure there is no interference in this process. 
      25. When complete it will display a notification PASS and your smartphone Samsung GALAXY S7 EDGE SM-G935F will automatically restart.
      26. Wait your device to boot up, it will take a while.
      27. When your Samsung GALAXY S7 EDGE SM-G935F is ready to use, you can check your firmware update version by dial *#1234# on dial pad.
        dial pad samsung GALAXY S7 EDGE SM-G935F
        dial pad samsung GALAXY S7 EDGE SM-G935F
      28. And you will see your new firmware version.
        firmware version samsung GALAXY S7 EDGE SM-G935F
        firmware version samsung GALAXY S7 EDGE SM-G935F
      29. Finish.


      30. Warning.
        Never disconnect the USB cable while flashing process is running.
        Install Samsung Mobile Driver or Samsung Smart Switch if you dont see a sign in Odin.
        Flash your Samsung GALAXY S7 EDGE SM-G935F device at your own risk.
        Flashing firmwares which contains more than one *.tar.md5 file will wipe all data on internal storage.  Flashing official/stock firmware wont increase the binary flash nor KNOX WARRANTY VOID counter and wont cancel the Samsung GALAXY S7 EDGE SM-G935F devices warranty. 


      Available link for download

      Read more »