Showing posts with label devices. Show all posts
Showing posts with label devices. Show all posts
Monday, April 3, 2017
How to Flash Stock Firmware on Samsung Galaxy Devices
How to Flash Stock Firmware on Samsung Galaxy Devices

How to Flash Stock Firmware on Samsung Galaxy Devices
Samsung phones are notoriously known for the lag issue on its TouchWiz interface. However, one cannot deny the fact that despite their minor and major drawbacks of their phones, Samsung is still the most popular OEM of smartphones. One of the reasons why Samsung Galaxy devices are popular among users is the ease with which we can find the official firmware for our phones and install them using their Odin tool.
If you got a Samsung phone or tablet and are having software based issues, you can easily restore the stock firmware on it and fix it yourself. Flashing a Samsung device is easier than most Android phones. This is because Samsung provides their own software that can be used to flash all their phone models (Samsung Kies). By using the unofficially released Odin tool, the flashing process becomes easier and smoother as compared to Kies.
The process described below is for flashing any Samsung device back to the original operating system (ROM) and/or for upgrading to any higher or a lesser version of Android version.
Disclaimer/Warning!
This tutorial is only for Samsung Android smartphones and tablets. While we have taken utmost care in describing the procedure in a detailed way, the user must be extra careful with selecting the correct firmware file to install it succesfully. If you have any doubts regarding the procedure, we suggest you to drop us a comment below to clear the same.Flashing the stock firmwares do not void your device’s warranty or trip KNOX Warranty counter. However, if you flash CF-Auto-Root packages or a custom recovery using Odin, doing so will void the warranty. Just follow the tutorial to the word carefully and everything will go fine hopefully. Technastic will not be responsible for any damages caused to your device.
Preparations
Charge Your Device
Before you proceed to install the firmware on your Samsung device, it’s important that your device has sufficient battery juice left on it. In case the battery turns off during firmware flashing, your phone be hard-bricked. To avoid any unpleasant experience, make sure your device has 60-70% battery power at least.

Enable Developer options and USB Debugging
To install a firmware successfully, you must enable USB Debugging on your phone and tablet. You can find this option under Developer Options. If you don’t find it under Settings, here’s is how you can enable it:
- Open Settings and go to About Device.
- Scroll down to Build number and tap it 7 times.
- You will see a toast message that “Developer mode has been enabled” on your device.
- Now go back to Settings panel and scroll down to Developer options.
- Tap it and check the box for USB debugging option to enable it.


Install the Latest Samsung USB Drivers
Install the latest Samsung USB drivers on your PC. If you already have them installed on your computer, you can skip this step.omputer. If you have Kies on your computer, make sure that the program is closed while you use Odin. You can download the Samsung USB Drivers from google search.
Backup the Apps and Important Data
It’s very important that you take a backup of all your apps, images, videos, messages, memos, and other important data present on your device before installing a new firmware. Usually, new firmwares don’t wipe any data, but you should still take precautions. You can find hundreds of useful backup apps at the Google Play Store to help you with the job.
Download Odin Flashing Tool
Now download the recommended Odin tool for flashing firmware on your Samsung device. As you know that there are several Odin versions available but considering the rate of success, you should use Odin3 v3.09 (for JellyBean and KitKat), or Odin3 v3.10.7, (for Lollipop and Marshmallow).
Download the Stock Firmware for Your Samsung Device
While downloading the stock firmware for your device, make sure you download the correct file for your device model. You can check the model by going to Settings> About. You can download the firmware from Samsung-Updates or Sammobile.
Reboot Your Samsung Galaxy Phone/Tab into the Download Mode
To install a stock firmware, or any .tar file, you will have to reboot your Samsung device into the Download or Odin Mode. You can easily access the Download Mode as follows: Turn off your device and then press and hold
Turn off your device. Now press and hold Volume UP+Home+Power buttons at the same time for about 2-3 seconds.

When you see the warning screen with a yellow triangle sign, press the Volume Up key to enter Download/Odin mode:
After pressing the Volume Up key, you device will get into the Odin or Download mode.

Flash Stock Firmware on Samsung Galaxy Using Odin
- If the firmware/CF-Root/custom recovery file you downloaded is a zip file, extract it to get the file with .tar or .tar.md5 extension.
- Extract the Odin zip file too, and launch the program by clicking the Odin3 vx.xx.exe file.
- Now turn off your device and reboot it into the Download Mode.
- Connect your device to the computer using a compatible USB cable.
- When your device is detected by Odin, the ID: COM port on Odin will turnBlue or Yellow depending on the Odin version and you’ll see “Added!!”message in the message box in Odin.
- In case your phone is not detected by Odin, try the following things:
- Reboot your phone and turn it off.
- Disable and enable USB Debugging again.
- Uninstall Samsung USB Driver or Kies and reinstall it.
- Reboot your PC.
- Use a different USB port.
- Try a different USB cable, preferably the one provided with your device.
- Click the AP or PDA button on Odin.
- Single firmware file installation: Navigate to the firmware or recovery file and select the file with .tar/.tar.md5 extension.
- Multi-file firmware installation: In case you have to install a multi-file firmware with AP, BL (bootloader), CP (modem), CSC, and .PIT files, you must add the firmware components to corresponding slots in Odin like shown below. If you don’t have the .PIT file for your device, click here to download or request it. Below is an example of Odin configuration while flashing a multifile firmware.
- Single firmware file installation: Navigate to the firmware or recovery file and select the file with .tar/.tar.md5 extension.
- In the Option section, make sure that only the Auto Reboot and F. Reset Time boxes are checked and everything else are unchecked.
- Having made sure that everything looks fine (as shown in the screenshots above), just click the Start button on Odin to initiate the firmware installation.
- Available link for download


Saturday, April 1, 2017
How to Recover Uninstalled Apps on Android Devices
How to Recover Uninstalled Apps on Android Devices

How to Recover Uninstalled Apps on Android Devices
It is for a certain fact that Android isn’t as stable as iOS, or Windows Phone, and it does have a lot more crashes and system failures than the other OSes. Believe me, I’m a full-time Android user, and the biggest pain is when you loose all of your data, particularly all of your installed applications.
Android is so vulnerable that, with just a little tap, it can eradicate every piece of the application installed on your device. Your 3-year old might’ve done it, or your sister, due to sibling rivalry (trust me, I know). In any case, the end result is always the same – how do your recover all of your uninstalled applications from your Android device?
While you cannot recover the data stored in it, you can still easily install all the applications using a section from the Google Play Store. This section, without any surprise, is that of ‘My Apps and Games‘ folder, which you always ignore. Once you tap on it, it’ll not only show you the currently installed applications, but it’ll also give you a visual overview of all the applications you have downloaded till date.
Recover Uninstalled Apps on Android
- Ensure you’re still logged into the same Google account as before, otherwise, this just won’t work.
- Launch the Google Play Store, and tap on the little ‘hamburger’ icon on the top-left corner to pull out a hidden menu. From the list, select ‘My Apps and Games‘.
- This will bring you to your currently installed screen of applications by default.
- You would want to swipe in from the right to hop into the other section, which showcases every single application you’ve ever downloaded on your Android device.
- Now, it is as easy as tapping the icons, and installing them as normal applications.


While this process can be quite tiresome, it is well worth the effort, otherwise, you would have to manually search for a specific application, and then install them.
Available link for download
Tuesday, March 21, 2017
Guide To Port ARMv7 Games To ARMv6 Devices
Guide To Port ARMv7 Games To ARMv6 Devices
ARMv6 in Easy Words Can Be Said As A Architectural Core..


What To Know:
What All You May Require:
ZipSigner2 - ZipSigner2.apk
AutoAPKTool - Here
Libs From Unity - Here
Notepad++ - Here
WinRAR - Here
Checking Whether Game is Of Unity Engine:
Checking The Version Of Unity3D:
Now, Conversion Of The Apk:
Finally:
Sign The Apk Using ZipSigner2[ROOT] in phone or Use AutoAPKTool in Computer..
Enjoy
What To Know:
- Its A Educational Trick
- I am not responsible for Using It For Other Processes.
- The Guide Will Only help To Port Older Version Of UNITY Engine Games.
- Unity3D Apps which cannot be ported may have libs in there obb.
- Every Game Will not work if ported like NFSMW, Asphalt, etc.
What All You May Require:
ZipSigner2 - ZipSigner2.apk
AutoAPKTool - Here
Libs From Unity - Here
Notepad++ - Here
WinRAR - Here
Checking Whether Game is Of Unity Engine:
- Open The Apk Using WinRAR
- Check Libs/Armeabi-V7/ - Two Files
-Libmono.so
-Libunity.so - Above^ Files Present So The Game Can Be Ported..
Checking The Version Of Unity3D:
- Open The Apk Using WinRAR
- Go To assets/bin/data
- Open the file mainData using Notepad++

Now, Conversion Of The Apk:
- Delete Armeabi-V7 Folder From
- -apk/libs/>here<
- -apk/assets/libs/>here<
- Replace with the One In The Libs.rar As Per The Version[Here We Have=3.5.5f3]
Finally:
Sign The Apk Using ZipSigner2[ROOT] in phone or Use AutoAPKTool in Computer..
Enjoy
SOME PORTED GAMES HERE: Download
Available link for download
Friday, February 24, 2017
HOW TO REMOVE FRP LOCK ON MTK DEVICES
HOW TO REMOVE FRP LOCK ON MTK DEVICES
HOW TO REMOVE FRP LOCK ON MTK DEVICES
Am going to show you how to remove factory reset protection {FRP} on mtk device
WHAT IS FRP {factory Reset rotection} ?.
Factory Reset Protection (FRP) is a security method that was designed to make sure someone cant just wipe and factory reset your phone if youve lost it or it was stolen. Starting with Android Lollipop, FRP is "standard" in vanilla Android, and most companies making our phones have implemented it in their own models. Its a good thing — it makes a stolen phone harder to use, which makes it less appealing to thieves, and anything that can protect our data on a phone weve lost is welcome.
The problem is that people are selling or trading or even giving away phones with FRP enabled and this makes things difficult for the next user.
How it works explains why. If you reset a phone with FRP enabled, you have to provide the user name and password for the last Google account that was registered with the device. There are random work-arounds on the Internet, but they tend to get patched almost as soon as they are discovered. Youll pretty much need to know the login details for the last account to use the phone before you can do anything with it if FRP was enabled before you reset it.
With these easy step am goin to show below
Downnload miracle box latest version hereUnder MTK tab click Unlock/Fix
Tick Clear Settings/Frp
Click Start button
When the backup flash pop up appears, Select NO
Connect the device to PC
Miracle Box will detect the device and start the process
When you see Done!, the process is complete
Disconnect and reboot phone
Note
First boot after this process is a bit longer than normal
See Picture Guide below

Available link for download
Wednesday, February 8, 2017
How to Install Latest TWRP Recovery on Android Devices
How to Install Latest TWRP Recovery on Android Devices

How to Install Latest TWRP Recovery on Android Devices
TWRP is the most popular custom recovery available for Android devices and it just got a newer version. So if you own an Android device that has already TWRP installed or any another recovery, it’s time for your to update to the latest TWRP 3.0.
For those who are unaware of TWRP or custom recoveries, let me clear things for you. TWRP is a custom recovery which lets you perform actions like:
- Installing ROMs, Mods or any other zip or .img files to your system.
- Making Nandroid backups, i.e. backup of your entire ROM including data and other partitions.
- Restore ROM backups
- Wipe any partition of your device,
These tasks cannot be performed by stock recovery, just like custom ROMs custom recoveries gives you more features and easy to use interface specially TWRP. Well the TWRP custom recovery gives you immense control of your device, but you should take things easy and do not play around with every option until you are sure what you are doing.
The newer version brings many changes, the most noticeable being the introduction of Material design. Other changes introduced in the latest version are:
- Completely new theme – Much more modern and much nicer looking (by z31s1g)
- True Terminal Emulator – Includes arrow keys, tab, and tab completion, etc. (by _that)
- Language translation – It won’t be perfect and especially some languages that require large font files like Chinese & Japanese won’t be available on most devices. Also, some languages may only be partially translated at this time. Feel free to submit more translations to OmniROM’s Gerrit. (mostly by Dees_Troy)
- Flashing of sparse images – On select devices you will be able to flash some parts of factory images via the TWRP GUI (by HashBang173)
- Adopted storage support for select devices – TWRP can now decrypt adopted storage partitions from Marshmallow
- Reworked graphics to bring us more up to date with AOSP – includes support for ADF and DRM graphics (by Dees_Troy)
- SuperSU prompt will no longer display if a Marshmallow ROM is installed
- Update exFAT, exFAT fuse, dosfstools (by mdmower)
- Update AOSP base to 6.0
- A huge laundry list of other minor fixes and tweaks


Install TWRP 3.0 on Your Android Device
Things You Will Need
- An Android device and a PC
- Download the latest TWRP.img for your device: Link
- Minimal ADB and Fastboot: Follow this guide and install Minimal Fastboot and ADB on your PC. (How to Get ADB and Fastboot within Seconds)
- Usb drivers: Link
Steps to Follow
Follow any one of the following methods that suit you:
For Those Who Already have an earlier version of TWRP
- Download the .img file for your device from the links given above.
- Boot your device into TWRP custom recovery.
- Select Install, then browse for the download image file. Keep in mind you will have to tap on Images button in the bottom right corner first in order to display .img files in the list. (as shown below).
- Now select the TWRP 3.0 .img file, then select Recovery partition on the next screen.(as shown in the screenshot below)
- Now swipe right to confirm the installation.
- Reboot to recovery, it should have been updated.


For Those Who Do Not Have a Custom Recovery Installed but have Root Privilege
- Download the TWRP manager app from Google Play Store.
- Select TWRP Install and select device name and version to install and then select Install Recovery.


Fastboot Install Method ( Who are Installing Custom Recovery for the First Time)
This method will most of the Android devices. If you are unable to install it or you get stuck somewhere feel free to leave a comment down below, we will be happy to help you.
- Download the .img file for your device from the links given above.
- Download and Install Minimal Fastboot and ADB following this guide.
- Copy the .img file to the Minimal ADB and Fastboot folder (usually C:Program Files (x86)Minimal ADB and Fastboot) and rename it to ‘twrp.img’.
- On your device, go to Settings -> About and find the Build Number and tap on it 7 times to enable developer settings. Press back and go into Developer Options and enable USB debugging.
- Connect your device to your PC via USB cable.
- Open Minimal ADB and Fastboot, it will open a command prompt
- Type the following command and hit Enter:
adb reboot bootloader - Above step will boot your device into fastboot mode. Now type the following command to install TWRP3.0:
fastboot flash recovery twrp.img - Now type the following command to reboot your device:
fastboot reboot - Now press the default key combo for your device for booting into Recovery mode.
Note many devices will replace your custom recovery automatically during first boot. To prevent this, use Google to find the proper key combo to enter recovery. After typing fastboot reboot, hold the key combo and boot to TWRP. Once TWRP is booted, TWRP will patch the stock ROM to prevent the stock ROM from replacing TWRP. If you don’t follow this step, you will have to repeat the installation process.
Once you have installed TWRP 3.0 custom recovery on your Android device, you could use to install any Mods or custom zip files on your device. But before installing any custom files on your device’s system make sure to backup your current ROM, using Backup option available in the TWRP recovery. Taking backup ensures that your data is safe and you could restore using this backup if something messes up your device. Also, make sure to flash files meant for your device/model only otherwise, your device could get bricked.
Flashing Zip Files Using TWRP Recovery
- Download the zip file and copy it to your device’s storage.
- Boot your device into TWRP recovery.
- Select Install button in the recovery and then browse for the zip file you want to install on your device.
- Now swipe to confirm the installation.
- Now tap the Reboot option and select System to see the effect of the ROM/mod you have installed.
Enjoy latest TWRP on your Android version and have the freedom of flashing anything on your device. But be careful! while using it. Let us know if you have any queries in the comment section below.
Available link for download
Wednesday, February 1, 2017
How To Disable Camera Shutter Sound in Redmi2 Redmi Note and Other MIUI Devices
How To Disable Camera Shutter Sound in Redmi2 Redmi Note and Other MIUI Devices
 Previously, I wrote post a on disabling camera shutter sound on Samsung and many other Android devices using the app named Enforced Stream Silencer. Unlike Samsung and other Android devices, MIUI devices like Redmi 2S/2A, Redmi Note, MI 4i, etc. doesnt need a third party app to disable the Camera Shutter sound as the default Camera app in MIUI has a built in option to turn off the annoying capture sound.
Here are the steps to turn off the camera sound in MI devices.
1. Open the Camera app.
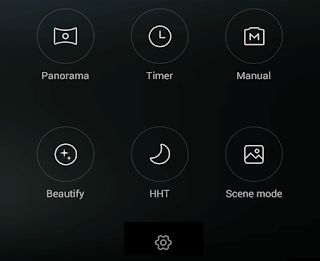
2. Swipe Left and tap on the Settings icon.
3. In Camera Settings page tap on Camera sounds toggle button to turn off the sound.
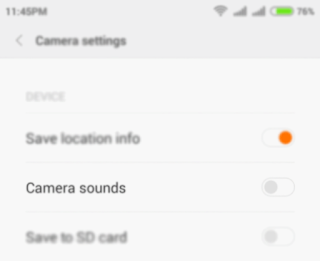
Thats it.
Available link for download
Tuesday, December 27, 2016
How to Bypass Factory Reset Protection on Nexus Devices FRP lock bypass
How to Bypass Factory Reset Protection on Nexus Devices FRP lock bypass
How to Bypass Factory Reset Protection on Nexus Devices- FRP lock bypass
Security is a major concern on every Android device. To make your device more secure Google introduced a new security measure in Android 5.0 A.K.A. Android Lollipop called Factory Reset Protection (FRP). If you are already familiar with the term factory reset, you may have figured out what FRP is. Factory Reset protection keeps your data safe in case your device gets stolen. It does so by requiring authentication after a factory reset to make the device usable.
Once the factory reset is done and the process to setup the device begins, the device will ask to enter the Google account and password that was previously linked with the device. This is Factory Reset Protection. Now, the device is not useful to the thief. Thank you, Google!
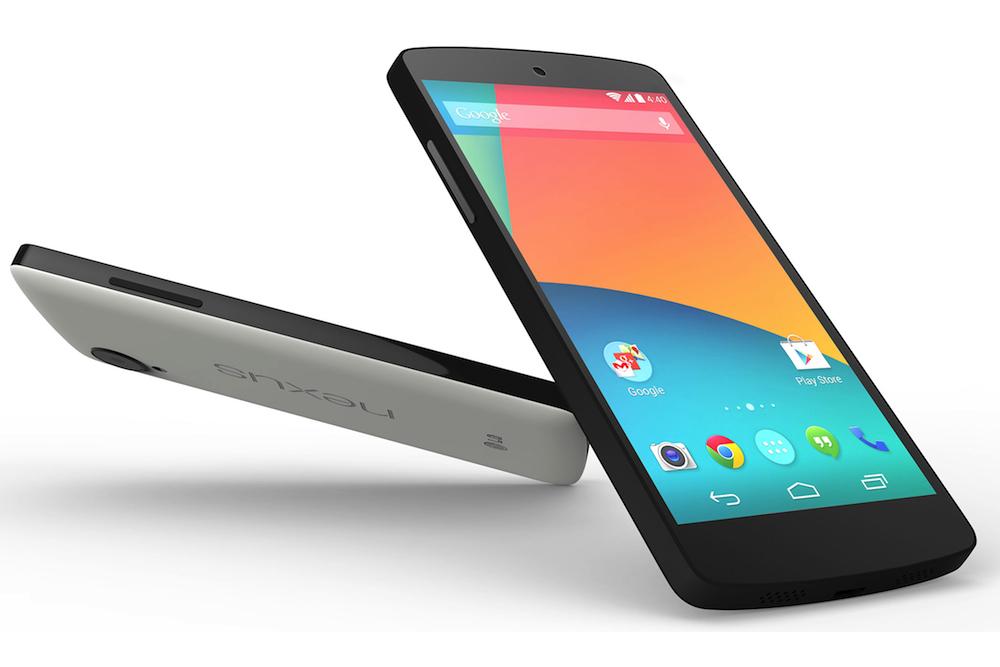
What if, instead of losing your device, you forget your password and Google account details? You are stuck; you can’t even make it usable via factory resetting your device (thanks to FRP). You already know that in order to activate FRP you must attach a Google account to your device, set a security option, and factory reset your device via stock recovery menu. If you happen to have a Nexus device (probably a recent one like Nexus 6P, 5X, Nexus 6, and 5) than the Factory Reset Protection can be bypassed in just a few minutes. Here’s how to do it.
Requirement for Performing This Procedure:
The device on which we performing this trick must have a SIM card in it.
Bypass Factory Reset Protection on Nexus Devices
Let’s begin!
Turn off your phone, enter into recovery menu, and factory reset your device.
Now you’ll see the setup wizard. Tap on any Wi-Fi connection to get the “enter password” field. But instead of entering the password hold down “,” button and go into settings.
Tap on language and then tap on the three vertical dots on the top right of the screen and then tap on “Help & feedback”.
Now you’ll get a search bar. Type anything there and hold the text and then select “Share” from the popup menu.
Choose the option to share it via Google messenger. Once the app opens, tap on “New message”.
Dial any number in the “To” input field and then tap on “Send to”.
You’ll see a contact’s like icon on the top right of the next screen. Tap on it and then tap on the “tick mark” icon. This will bring up phone icon that will let you make a call.
Once the call is placed hit the pause button and then hit add dialler button. This will bring up the dialler.
In the input field, type *#*#4636#*#*. Doing so will open up the test mode.
Tap on “Usage statistics” and then tap on the back option. Now you’ll be in device’s settings menu.
From the settings, you can factory reset your phone.
Now, the requirement for FRP to appear is that a Google account must be attached and your phone must have security option enabled. Since neither of these requirements is fulfilled while factory resetting the device for the second time, FRP will be bypassed.
Available link for download
Subscribe to:
Posts (Atom)