Let us begin with knowing a little about what is a custom Recovery & what are its uses after then we will move forward step by step for installing it on your android Device properly.
Some of its key features are-
> Rom Backup
> Flashing any Update.zip package.
> Replacing your stock android operating system with a new custom official or unofficial operating system like MIUI, CyanogenMod, Paranoid Android etc. This is also known as flashing a custom ROM.
> Wiping Data/factory reset or flashing various kernels.
and much more...
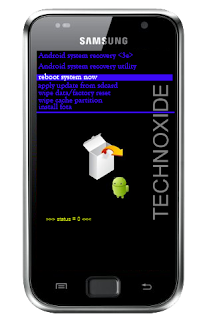
For booting into the custom recovery installed, the user have to press the required key in combinations which might be different for various android devices.
ex: Power+vol up/vol down etc
Step 1- Download and install Mobileuncle tools app. (Download link given below).

Step 2- Download CWM/TWRP recovery file of your device and rename it torecovery.img .
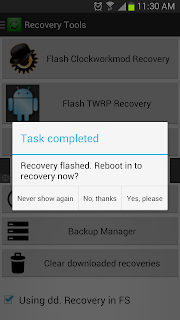
Step 3- Open mobileuncle tools and click on "recovery update" there you will findrecovery.img on the top, select it. Press OK it will reboot your device into your required recovery.

DONE!!
>>Download Mobileuncle Tools Here<<
Step 1- Download flashify from the link given below (or from Google Playstore) and install it on the device.
Step 2- After that download CWM/TWRP recovery file for your device and rename it to recovery.img
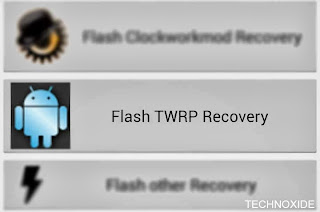
Step 3- Open Flashify and tap on recovery image option.

Step 4- Now a pop up will appear just click on choose a file to select one of your file explorer app and browse to the file recovery.img.


Step 5- Tap on the .img file and tap on Yup.
Done!!
>>Download Flashify Here<<
NOTE - IN BOTH THE METHODS ALLOW SUPERUSER PERMISSION REQUEST PROMPTED BY THE APP.
Read more »

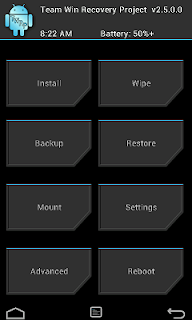
What is a Custom RECOVERY??
A custom recovery is a replacement for stock recovery found on every android device. It is an .img(image) file that can be flashed using different methods which we will be talking today.Some of its key features are-
> Rom Backup
> Flashing any Update.zip package.
> Replacing your stock android operating system with a new custom official or unofficial operating system like MIUI, CyanogenMod, Paranoid Android etc. This is also known as flashing a custom ROM.
> Wiping Data/factory reset or flashing various kernels.
and much more...
For booting into the custom recovery installed, the user have to press the required key in combinations which might be different for various android devices.
ex: Power+vol up/vol down etc
>Installation Guide< (For Rooted Users)
Using Mobileuncle Tools/Mtk Devices
Step 1- Download and install Mobileuncle tools app. (Download link given below).
Step 2- Download CWM/TWRP recovery file of your device and rename it torecovery.img .
Step 3- Open mobileuncle tools and click on "recovery update" there you will findrecovery.img on the top, select it. Press OK it will reboot your device into your required recovery.
DONE!!
>>Download Mobileuncle Tools Here<<
Using Flashify/Snapdragon and all the others
Step 1- Download flashify from the link given below (or from Google Playstore) and install it on the device.
Step 2- After that download CWM/TWRP recovery file for your device and rename it to recovery.img
Step 3- Open Flashify and tap on recovery image option.
Step 4- Now a pop up will appear just click on choose a file to select one of your file explorer app and browse to the file recovery.img.
Step 5- Tap on the .img file and tap on Yup.
Done!!
>>Download Flashify Here<<
NOTE - IN BOTH THE METHODS ALLOW SUPERUSER PERMISSION REQUEST PROMPTED BY THE APP.
Read more »