Friday, December 30, 2016
How to change Computer icon without any software in windows 10
How to change Computer icon without any software in windows 10
Hello Everyone ! are you tired of old My computer icon in your desktop?? Me too! In this tutorial i will show you how to change My Computer icon without any software in Windows 10.
Lets begin!! I think visual representation is better than anything.So, ive created a video tutorial for this.Watch the video given below,it shows detailed steps. Its very simple :)
Lets begin!! I think visual representation is better than anything.So, ive created a video tutorial for this.Watch the video given below,it shows detailed steps. Its very simple :)
Click here to subscribe my YouTube Channel.
--------------------
Regards
Shankha Jana
--------------------
Regards
Shankha Jana
Available link for download
Thursday, December 29, 2016
Highscreen Alpha Rage Pc Suite and Usb Driver free Download
Highscreen Alpha Rage Pc Suite and Usb Driver free Download
Highscreen Alpha Rage Pc Suite and Usb Driver free Download
Here is a free Usb Drivers and Pc Suite Highscreen Alpha Rage. Make sure you have the correct type model your smartphone before downloading the Usb Driver and Pc Suite device to your computer. For how to download and install the Usb Driver, Pc Suite Com port and Modem do this tutorial, please you can directly see below.

Model Type : Highscreen Alpha Rage Smartphone
Package Included : Highscreen Alpha Rage Usb Driver, Pc Suite, Com port, Modem
Supported Os : Windows Xp / Vista / 7 / 8 / 32 bit & 64 bit
File Size : 9.09Mb
File Size : 9.09Mb
Highscreen Alpha Rage Usb Driver and Pc Suite to Install tutorial :
Note : Keep in mind that if your Highscreen Alpha Rage Usb Driver and Pc Suite smartphone powered by Mtk processor you use, here will be discussed and a tutorial on how to install the Usb and Pc Suite drivers for this model.
Warning : Run as administrator if you are using Windows Xp, Windows Vista, Windows 7 and Windows 8 in order for the Highscreen Alpha Rage Smartphone Usb Driver and Pc Suite to work properly.
Please skip the instructions below if device you are using is not supported by Mtk Cpu :
- Enable Usb Driver and Pc Suite debugging immediately on Highscreen Alpha Rage Usb Driver and Pc Suite to do that you go to Settings> Developer Options.
- This Usb Driver and Pc Suite download for you to use the computer (for the download link provided at the end of this article you can directly download), extract the files downloaded earlier using WinZip or WinRAR, locate the file (PdaNetA4150.exe) and launch it (only in case be sure to close all programs that run on your computer). Download here Usb Driver and Pc Suite
- Select the model you are using a Highscreen Alpha Rage Smartphone, then you press the button to install it. Now its time to connect the Usb Driver and Pc Suite you are using, there will be a popup message saying that the phone you are using now connected. Congratulations you have completed the installation.
Well, it was a glimpse of the review and how to download and install it step by step in Usb Driver and Pc Suite Highscreen Alpha Rage Smartphone you use, thank you visit, use his congratulations and success.
Available link for download
How to fix If Google Play Store Not Working On Your Phone
How to fix If Google Play Store Not Working On Your Phone

How to fix If Google Play Store Not Working On Your Phone?
Google play store works as a medium between our smartphones and the awesome apps and games. Without it installing apps and games becomes quite troublesome.
What if it stops working all of a sudden? What if it won’t open? What if the downloading never starts or never completes? If you haven’t faced such problem with Google play store, you are few of the lucky ones and deserve the highest of fives.
Here are some of the methods that you can use when Google play store stops working.
1. Restart Your Device
This is the first and foremost thing to do. Sometimes the problem can be solved with just a simple reboot. Not just this problem, if you are facing any kind of problem, it is recommended to perform a reboot before doing anything else.
2. Check Date & Time
Did you know that most of the time you can’t access Google or any other website if date & time in your computer is not correct? I don’t know the exact reason but I guess this happens because Google servers are not able to synchronize with your date & time settings. The logic is similar to the phone. Make sure that your phone’s date & time are accurate.
3. Force Stop
Force stop simply means turning off an app with force. Sometimes a simple force close could solve the problem. To force close Google play store, go to your phone’s settings and open Google play store in the application manager. Once it is open, tap “FORCE STOP” to close. Before doing so make sure that Google play store is removed from your recent apps list.
4. Clear App Cache & App Data
If the above-mentioned methods didn’t solve your problem, it’s time to clear app cache. App cache simply means the information that an app stores in order to reduce the loading time when you open that app the next time. But sometimes the old information, which is not being used any more, may stay there and cause the app to behave differently. So it’s recommended to clear app cache from time to time.
To clear cache, open Google play store in the application manager and tap on “CLEAR CACHE”. This should generally solve the problem. But if the problem is still there, you might need to clear app data.
To clear app data, open Google play store in the application manager and tap ” CLEAR DATA “. Doing so will delete all the data or login information shared with Google play store.
5. Uninstall Updates
Sometimes there may be a problem with the software itself. In such case, you’ll have to uninstall the app. But since Google play store is a system app it cannot be removed. However, you can uninstall the updates. Doing so well revert it back to the older version. To do so open Google play store in application manger and tap on ” UNINSTALL UPDATES”.
6. Remove Your Google Account
If the problem is merely a log in issue, removing and re-adding your Google account may solve the problem. Here’s how to remove your Google account:
- Open your phone’s settings app
- Look for “Accounts” which is under “Personal” subheading
- Tap on “Accounts” and then tap on “Google”
- Next, tap on your Gmail ID
- Now, tap on the three vertical dots on the top right of the screen
- Select “Remove account” from the menu
- On the pop-up menu tap on “Remove account”
Now your Gmail account is removed from your device.
To re-add that account simply open any Google app and log in using the required information. This should solve the problem. If not, read on.
7. Don’t Ignore Google Play Services
Google play services are the backbone of all the awesome Google features on your phone. Sometimes the problem could be with the Google play services instead of Google play store. To solve the problem with the services, try clearing app cache, manage space, or disable it once and enable again.
8. Perform Factory Reset
Factory resetting your phone is a dangerous task since all your data will be erased so it should be done only if no other choice of left.
Before performing a factory reset make sure that all your data is backed up since you’ll lose all the data after factory reset.
To perform a factory reset go to your phone’s settings option, then to “Backup & reset”which is under “Personal” subheading, then tap on “Factory data reset”.
9. Edit Host File (For Rooted Users)
If your phone is rooted you can solve this problem but editing the host file. Here’s how to do it:
- Open a file manager that supports root directory
- Navigate to system > etc > hosts and select edit
- Add a hashtag to the front of the second set of numbers and save
- your changes (i.e. change from 127.0.0.1 to #127.0.0.1)
- Reboot your device
- Re-add your Google account
Your Google play store problems should be fixed now.
Available link for download
Hamachi Linux GUI Haguichi 1 3 0 Released With New UI
Hamachi Linux GUI Haguichi 1 3 0 Released With New UI
Haguichi, a Hamachi GUI for Linux, was updated to version 1.3.0 and with this release, the app has migrated from Mono and GTK2 to Vala and GTK 3 and uses a completely revamped user interface.
 |  |
With the port to GTK3 (GTK 3.14 is required and thus, it needs Ubuntu 15.04 or newer), Haguichi has switched to using client side decorations however, desktops that dont fully support CSD, like Unity, are still supported and in such cases, a classic titlebar is displayed along with a toolbar (which has replaced the menu):

Just like in the previous releases, an AppIndicator is provided as an optional package.
Haguichi 1.3.0 also includes HiDPI support, a flexible layout (the UI adapts dynamically to the window size - see first two screenshots above), a sidebar that shows details and actions for the selected network or member, and a new logo.
Other changes in Haguichi 1.3.0:
- added short text to empty network list on how to add a network;
- added symbolic application and panel icons for adwaita-icon-theme;
- commands that don’t actually exist are not shown as member action any more;
- unicode characters are now used for ellipsis and quotation marks;
- changed autostart .desktop file installation path back to /usr/etc/xdg/autostart;
- dropped support for Hamachi version 2.1.0.81 and older;
- removed deprecated status icon;
- updated translations.
Along with this release, the Haguichi website was completely redesigned and a T-shirt campaign was launched.
For those not familiar with Hamachi, this is a zero-configuration virtual private network app, capable of establishing direct links between computers that are behind NAT firewalls without requiring reconfiguration (in most cases). Basically, the app establishes a connection over the Internet that emulates the connection that would exist if the computers were connected over a local area network.
Install Haguichi in Ubuntu or Linux Mint via PPA
To add the official Haguichi PPA and install the app in Ubuntu or Linux Mint (important note: the latest Haguichi 1.3.0 is only available for Ubuntu 15.04 and 15.10 because it requires GTK 3.14+; for older Ubuntu versions, Haguichi 1.0.26 will be installed, which uses Mono and GTK2), use the following commands:
sudo add-apt-repository ppa:webupd8team/haguichi
sudo apt-get update
sudo apt-get install haguichi
To install the Haguichi Unity AppIndicator (it should be installed automatically with Haguichi, but Im adding this in case youre using an Ubuntu-based distro that doesnt install recommended packages by default, like Linux Mint), use the following command:
- for Ubuntu 15.04 and newer:
sudo apt-get install haguichi-indicatorsudo apt-get install haguichi-appindicatorReport any bugs you may find @ Launchpad.
info and 2 screenshots from Haguichi.net

Available link for download
How To Enable Voice Calling On Samsung Galaxy Tab 10 1
How To Enable Voice Calling On Samsung Galaxy Tab 10 1
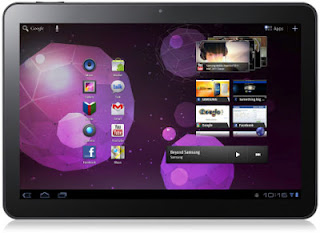
Requirements:
- Samsung Galaxy Tab 10.1 3G [GT-P7500].
- You Must have Unlocked Recovery Mode. For Flashing .zip
- Any ROM based on Stock ICS 4.0.4 OR JB CyanogenMod10 Or ICS CyanogenMod9 OR AOKP.
Go to XDA forum thread to download latest builds and get the tutorial on flashing.
Available link for download
Subscribe to:
Posts (Atom)