Showing posts with label fix. Show all posts

Wednesday, April 12, 2017

Guide How to Flash Stock ROM on Android OPPO F1 PLUS to Fix a Bootloop Removing Malware Stuck

Guide How to Flash Stock ROM on Android OPPO F1 PLUS to Fix a Bootloop Removing Malware Stuck


[Guide] How to Flash Stock ROM on Android OPPO F1 PLUS to Fix a Bootloop, Removing Malware, Stuck.

Flash Stock ROM on Android OPPO F1 PLUS. This guide will help you to Flash Stock ROM on Android OPPO F1 PLUS Smartphone. By flashing your Android phone you can get something new on your phone, such as new experience to use latest update of Stock ROM, or new installed Stock ROM after your phone died or bootloop, and much more. Before we proceed to flash this Android OPPO F1 PLUS Smartphone, let we know what is detail specification of this Android smartphone. OPPO F1 PLUS was released On 2016, March. And OPPO F1 PLUS is the smartphone that comes with 5,5 Inches AMOLED capacitive touchscreen, 16M colors, Run on Android OS, v5.1 (Lollipop) - ColorOS 3.0 UI as it Operating System and supported with Mediatek MT6755 Helio P10 Chipset, Octa-core 2.0 GHz Cortex-A53 CPU, GPU Mali-T860MP2, combined with 4 GB of RAM as their engine. And you can enjoy exciting 13 MP on main camera, and 16 MP on secondary camera.

Now, we start to flash Stock ROM on Android OPPO F1 PLUS Smartphone. Just follow this guide below carefully. take your own risk, a damage or broken phone by following this tutorial is not our responsibility. 

Guide Flash Stock ROM OPPO F1 PLUS.

Before you flash OPPO F1 PLUS you must read this instruction carefully, so. you can get best result at the end of your flash.

Preparation.

  1. Make sure you have enough battery capacity on your OPPO F1 PLUS. Its recomended you have at least 80% of battery capacity.
  2. Always backup your important file (contact, music, video, app) that stored on OPPO F1 PLUS
  3. Prepare the Memory Card / SD Card which has a V-Gen Brand. For some reason OPPO F1 PLUS does not recognized besides V-Gen Memory card.
  4. Then download OPPO F1 PLUS Stock ROM.
    • Oppo F1 PLUS
    • http://downloads.oppo.com.s3.amazonaws.com/firmware/X9009/X9009EX_11_OTA_013_all_201604131943.zip
  5. Once download finish, now copy Stock ROM from computer to the phone memory or SD Card. but note that you copy this ROM at outside not to the public folder for easy finding. (if you download ROM Via PC)
  6. But, Stock ROM can be download directly from yourAndroid phone. And you must have a good  and stable internet connection for it, such as Wi-Fi connection.
  7. Rom download directly from the Android phone located in the File Manager / phone / download.

Flashing Stock ROM.

  1. To start flashing Stock ROM on OPPO F1 PLUS you must enter Recovery Mode. how to do it ?
    • Press and Hold Power Button + Volume Down.
  2. Then you will see menu like this picture. You can select English
  3. Flash Bootloop OPPO F1 PLUS
    Flash Bootloop OPPO F1 PLUS
  4. Select Wipe data and cache by pressing the power button. for Up and down choice, use the volume keys Up / Down, on the next Popup screen select Wipe your data cache to make faster process.
  5. Flash Bootloop OPPO F1 PLUS
    Flash Bootloop OPPO F1 PLUS
  6. If appears confirmation you can select : "YES"
  7. Flash Bootloop OPPO F1 PLUS
    Flash Bootloop OPPO F1 PLUS
  8. Then you will bring to previous menu, and you can select Install form sd.
  9. Flash Bootloop OPPO F1 PLUS
    Flash Bootloop OPPO F1 PLUS
  10. Now you will see 2 options. From mobile phone storage & form SD,.
  11. Flash Bootloop OPPO F1 PLUS
    Flash Bootloop OPPO F1 PLUS
  12. Previously you have copy firmware file on SD Card, So. now you must select From SD. and now you can see your Firmware file name on this screen.(Stock rom name is similar as shown on the picture below)
  13. Flash Bootloop OPPO F1 PLUS
    Flash Bootloop OPPO F1 PLUS
  14. Select this file name using Power Button
  15. For Up or Down navigation you can use volume Up and Down Button.
  16. Then you will see a confirmation page, and you can select yes to proceed this flash on OPPO F1 PLUS
  17. Flash Bootloop OPPO F1 PLUS
    Flash Bootloop OPPO F1 PLUS
  18. Just wait the process finish updating system, and your OPPO F1 PLUS will ask to you to reboot the device.
  19. Flash Bootloop OPPO F1 PLUS
    Flash Bootloop OPPO F1 PLUS
  20. Now you have finished flash Stock ROM on Android OPPO F1 PLUS Smartphone.


Available link for download

Read more »

Tuesday, April 11, 2017

How to fix USB Error 23 Stereos

How to fix USB Error 23 Stereos


Recently I had an unpleasant experience with my Pioneer DEH-159OUB car stereo, when I inserted my SanDisk Ultra Dual USB Drive 3.0 16 GB to play some music. Each time when switched the mode to USB, it was displaying ERROR 23 again and again no matter what I did. It was a long drive that I was up to and unfortunately drove without playing a single song because of that error.

So whats this ERROR 23 really is?
The following error shows up when the stereo doesnt detects the USB device which we insert or in other words the Files system of the USB is not recognized by it.
Soon after when the error was encountered, I recalled back and spent hours thinking what else I did with my USB flash drive which was causing the error and finally got the answer. I had made my flash drive bootable using RUFUS which changed the format of the thumb drive to NTFS, and when my job was finished I simply copied my songs folder in it and started packing up for the journey.

So here are the simplest steps to bypass the USB ERROR 23,
• First thing first, connect your USB flash drive to the PC & backup whats inside!!

• After that, Right click on the drive and click Properties. Where you can see that its not the same format that the stereo supports (which is FAT 32).


USB Error 23 finally fixed!

• Now close the properties window and right click on the drive again and hit the format option. (As shown in figure)

• Change the File system to FAT 32 (Default) and hit the Start option.


USB Error 23 finally fixed!

• It will delete all the files in it (thats why we did the backup of the contents before).

• Done!!! Just copy your music files back to your flash drive and connect it to the stereo again, there will be no sign of ERROR 23 from now.

Note: Even after following the steps still the error is showing up, then probably the problem is with your USB thumb drive. You can simply run a check using free tools like windows Check Disk (CHKDSK) to see whats wrong with the device. Sometimes lots of bad sectors present in drives causes performance degradation.

Thats it!! If you have any kind of problem related to the following topic you can comment it down below like always.
Happy Driving!!


Available link for download

Read more »

Friday, April 7, 2017

How to Fix Android Pay Cannot be Used

How to Fix Android Pay Cannot be Used


If you have installed your smartphone android pay app and pay in android pay and get the "Android Pay cannot be used" error on your smartphone screen and cant work android pay. Most this error shows because the app used on root phone.


What is Android Pay

Android Pay is second major mobile wallet, and running on Android 4.4 Kitkat and above versions. If you are already using Google Wallet then you can update into Android Pay. It is Googles separate app. It is also same like Apple Pay and Samsung Pay.

Fix Android Pay cannot be used

Step : 1
First of all Update your Google Play Services App.

Step : 2
Install SuperSU app, if not install

Step : 3
Unchecked Enable Superuser to disable root on Settings panel.

Read Also : Top 10 Best Anti theft app for Android

Step :4
Add card on Android Pay.

Step :5
After adding card on Android Pay enable root access again.

I think, After all steps you cant face "Android Pay cannot be used" error on your smartphone.

Incoming Search Terms:
What is Android Pay, Android Pay cannot be used, Fix Android Pay cannot be used, Android Pay Error, Solve Android Pay Error


Available link for download

Read more »

Thursday, April 6, 2017

How To Fix Unable to resolve the servers DNS address Error

How To Fix Unable to resolve the servers DNS address Error


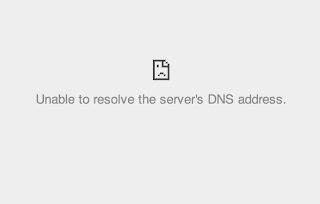
Unable to resolve the servers DNS address, Mostly I get this error on embedded video players in web pages. This is a common error, mainly because the ISP cant find the server or the server blocked by the ISP. When we connect to internet, by default we use the DNS provided by an ISP (Assigns Automatically ). So changing this default DNS to any free DNS servers like Google DNS, OpenDNS, etc. will fix the issue completely.

Google Public DNS
Primary DNS: 8.8.8.8
Secondary DNS: 8.8.4.4

Open DNS
Primary DNS: 208.67.222.222
Secondary DNS: 208.67.220.220

As I mentioned above changing the DNS to any of the provided one will fix the DNS error. Follow the below steps to change the network DNS to a custom one.

How to
1. Open Run Command (Press Windows + R )
2. Type ncpa.cpl then, press OK.
3. Right click the Network Adapter you are using and select Properties.
4. In the Properties Window, Double click on Internet Protocol Version 4(TCP/IPv4)
5. Tick Use the following DNS server addresses.
6. Finally enter any of the DNS provided.
For example Use Google Public DNS
Primary DNS: 8.8.8.8
Secondary DNS: 8.8.4.4

Thats it...


Available link for download

Read more »

Monday, April 3, 2017

Guide How to Flash Stock ROM on Android OPPO R2001 YOYO to Fix a Bootloop Removing Malware Stuck

Guide How to Flash Stock ROM on Android OPPO R2001 YOYO to Fix a Bootloop Removing Malware Stuck


[Guide] How to Flash Stock ROM on Android OPPO R2001 YOYO to Fix a Bootloop, Removing Malware, Stuck.

Flash Stock ROM on Android OPPO R2001 YOYO. This guide will help you to Flash Stock ROM on Android OPPO R2001 YOYO Smartphone. By flashing your Android phone you can get something new on your phone, such as new experience to use latest update of Stock ROM, or new installed Stock ROM after your phone died or bootloop, and much more. Before we proceed to flash this Android OPPO R2001 YOYO Smartphone, let we know what is detail specification of this Android smartphone.OPPO R2001 YOYO was released On 2014, May. And OPPO R2001 YOYO is the smartphone that comes with 4,7 Inches IPS LCD capacitive touchscreen, 16M colors, Run on Android OS, v4.2.1 (Jelly Bean) - ColorOSUI as it Operating System and supported with Mediatek MT6582M Chipset, Quad-core 1.3 GHz Cortex-A7 CPU, GPU Mali-400MP2, combined with 1 GB of RAM as their engine. And you can enjoy exciting 5 MP on main camera, and 2 MP on secondary camera.

Now, we start to flash Stock ROM on Android OPPO R2001 YOYO Smartphone. Just follow this guide below carefully. take your own risk, a damage or broken phone by following this tutorial is not our responsibility. 

Guide Flash Stock ROM OPPO R2001 YOYO.

Before you flash OPPO R2001 YOYO you must read this instruction carefully, so. you can get best result at the end of your flash.

Preparation.

  1. Make sure you have enough battery capacity on your OPPO R2001 YOYO. Its recomended you have at least 80% of battery capacity.
  2. Always backup your important file (contact, music, video, app) that stored on OPPO R2001 YOYO
  3. Prepare the Memory Card / SD Card which has a V-Gen Brand. For some reason OPPO R2001 YOYO does not recognized besides V-Gen Memory card.
  4. Then download OPPO R2001 YOYO Stock ROM.
    • Oppo R2001 YOYO
    • http://assorted.downloads.oppo.com/firmware/R2001/R2001_11.A.14_OTA_INT_014_all_151016.zip
  5. Once download finish, now copy Stock ROM from computer to the phone memory or SD Card. but note that you copy this ROM at outside not to the public folder for easy finding. (if you download ROM Via PC)
  6. But, Stock ROM can be download directly from yourAndroid phone. And you must have a good  and stable internet connection for it, such as Wi-Fi connection.
  7. Rom download directly from the Android phone located in the File Manager / phone / download.

Flashing Stock ROM.

  1. To start flashing Stock ROM on OPPO R2001 YOYO you must enter Recovery Mode. how to do it ?
    • Press and Hold Power Button + Volume Down.
  2. Then you will see menu like this picture. You can select English
  3. Flash Bootloop OPPO R2001 YOYO
    Flash Bootloop OPPO R2001 YOYO
  4. Select Wipe data and cache by pressing the power button. for Up and down choice, use the volume keys Up / Down, on the next Popup screen select Wipe your data cache to make faster process.
  5. Flash Bootloop OPPO R2001 YOYO
    Flash Bootloop OPPO R2001 YOYO
  6. If appears confirmation you can select : "YES"
  7. Flash Bootloop OPPO R2001 YOYO
    Flash Bootloop OPPO R2001 YOYO
  8. Then you will bring to previous menu, and you can select Install form sd.
  9. Flash Bootloop OPPO R2001 YOYO
    Flash Bootloop OPPO R2001 YOYO
  10. Now you will see 2 options. From mobile phone storage & form SD,.
  11. Flash Bootloop OPPO R2001 YOYO
    Flash Bootloop OPPO R2001 YOYO
  12. Previously you have copy firmware file on SD Card, So. now you must select From SD. and now you can see your Firmware file name on this screen.(Stock rom name is similar as shown on the picture below)
  13. Flash Bootloop OPPO R2001 YOYO
    Flash Bootloop OPPO R2001 YOYO
  14. Select this file name using Power Button
  15. For Up or Down navigation you can use volume Up and Down Button.
  16. Then you will see a confirmation page, and you can select yes to proceed this flash on OPPO R2001 YOYO
  17. Flash Bootloop OPPO R2001 YOYO
    Flash Bootloop OPPO R2001 YOYO
  18. Just wait the process finish updating system, and your OPPO R2001 YOYO will ask to you to reboot the device.
  19. Flash Bootloop OPPO R2001 YOYO
    Flash Bootloop OPPO R2001 YOYO
  20. Now you have finished flash Stock ROM on Android OPPO R2001 YOYO Smartphone.


Available link for download

Read more »

Saturday, March 25, 2017

Guide How to Flash Stock ROM on Android OPPO NEO 3 to Fix a Bootloop Removing Malware Stuck

Guide How to Flash Stock ROM on Android OPPO NEO 3 to Fix a Bootloop Removing Malware Stuck


[Guide] How to Flash Stock ROM on Android OPPO NEO 3 to Fix a Bootloop, Removing Malware, Stuck.

Flash Stock ROM on Android OPPO NEO 3. This guide will help you to Flash Stock ROM on Android OPPO NEO 3 Smartphone. By flashing your Android phone you can get something new on your phone, such as new experience to use latest update of Stock ROM, or new installed Stock ROM after your phone died or bootloop, and much more. Before we proceed to flash this Android OPPO NEO 3 Smartphone, let we know what is detail specification of this Android smartphone.OPPO NEO 3 was released On 2014, August. And OPPO NEO 3 is the smartphone that comes with 4,5 Inches IPS LCD capacitive touchscreen, 16M colors, Run on Android OS, v4.2.1 (Jelly Bean) - ColorOS v1.4 UI as it Operating System and Dual-core 1.3 GHz CPU, combined with 1 GB of RAM as their engine. And you can enjoy exciting 5 MP on main camera, and 2 MP on secondary camera.

Now, we start to flash Stock ROM on Android OPPO NEO 3 Smartphone. Just follow this guide below carefully. take your own risk, a damage or broken phone by following this tutorial is not our responsibility. 

Guide Flash Stock ROM OPPO NEO 3.

Before you flash OPPO NEO 3 you must read this instruction carefully, so. you can get best result at the end of your flash.

Preparation.

  1. Make sure you have enough battery capacity on your OPPO NEO 3. Its recomended you have at least 80% of battery capacity.
  2. Always backup your important file (contact, music, video, app) that stored on OPPO NEO 3
  3. Prepare the Memory Card / SD Card which has a V-Gen Brand. For some reason OPPO NEO 3 does not recognized besides V-Gen Memory card.
  4. Then download OPPO NEO 3 Stock ROM.
    • Oppo NEO 3
    • http://assorted.downloads.oppo.com/firmware/R831K/R831K_11.A.16_OTA_INT_016_all_151103.zip
  5. Once download finish, now copy Stock ROM from computer to the phone memory or SD Card. but note that you copy this ROM at outside not to the public folder for easy finding. (if you download ROM Via PC)
  6. But, Stock ROM can be download directly from yourAndroid phone. And you must have a good  and stable internet connection for it, such as Wi-Fi connection.
  7. Rom download directly from the Android phone located in the File Manager / phone / download.

Flashing Stock ROM.

  1. To start flashing Stock ROM on OPPO NEO 3 you must enter Recovery Mode. how to do it ?
    • Press and Hold Power Button + Volume Down.
  2. Then you will see menu like this picture. You can select English
  3. Flash Bootloop OPPO NEO 3
    Flash Bootloop OPPO NEO 3
  4. Select Wipe data and cache by pressing the power button. for Up and down choice, use the volume keys Up / Down, on the next Popup screen select Wipe your data cache to make faster process.
  5. Flash Bootloop OPPO NEO 3
    Flash Bootloop OPPO NEO 3
  6. If appears confirmation you can select : "YES"
  7. Flash Bootloop OPPO NEO 3
    Flash Bootloop OPPO NEO 3
  8. Then you will bring to previous menu, and you can select Install form sd.
  9. Flash Bootloop OPPO NEO 3
    Flash Bootloop OPPO NEO 3
  10. Now you will see 2 options. From mobile phone storage & form SD,.
  11. Flash Bootloop OPPO NEO 3
    Flash Bootloop OPPO NEO 3
  12. Previously you have copy firmware file on SD Card, So. now you must select From SD. and now you can see your Firmware file name on this screen.(Stock rom name is similar as shown on the picture below)
  13. Flash Bootloop OPPO NEO 3
    Flash Bootloop OPPO NEO 3
  14. Select this file name using Power Button
  15. For Up or Down navigation you can use volume Up and Down Button.
  16. Then you will see a confirmation page, and you can select yes to proceed this flash on OPPO NEO 3
  17. Flash Bootloop OPPO NEO 3
    Flash Bootloop OPPO NEO 3
  18. Just wait the process finish updating system, and your OPPO NEO 3 will ask to you to reboot the device.
  19. Flash Bootloop OPPO NEO 3
    Flash Bootloop OPPO NEO 3
  20. Now you have finished flash Stock ROM on Android OPPO NEO 3 Smartphone.


Available link for download

Read more »

Friday, March 17, 2017

How to fix Cannot Connect To Camera Error in Samsung Galaxy SIII

How to fix Cannot Connect To Camera Error in Samsung Galaxy SIII


                            Hi this is rajtechieguy in this tutorial i will show you how to fix Cannot Connect to camera error in samsung galaxy SIII after rooting and flashing the rom in the galaxy SIII before doing this backup your all data.they were two methods to do this let see these


 Requirement

  • Zip file
 Method - 1

  • Step 1: Download this zip and place in your SD Card

  • Step 2: And enter into the recovery mod and flash the zip file.
  • Step 3: Wipe Cache & Dalvik (optional)
  • Step 4: Fix Permissions
  • Step 5: After Complete the Process reboot into Android
  • Step 6: Start the camera app 
 Method-2

  • Step 1: Download any TouchWiz based ROM to your phone or computer.
  • Step 2: Unzip the ROM
  • Step 3: Goto /system/cameradata and copy all the SlimISP files to your phone.
  • Step 4: Goto /data and there should be another SlimISP bin file, copy that but dont mix it up.
  • Step 5: Move these to the files to the corresponding areas of your phone.
  • Step 6: Check permissions, I granted full access to Root, and User
  • Step 7: Start the camera app and cross your fingers
  • Step 8: Reboot if it didnt work immediately


Available link for download

Read more »

Saturday, March 11, 2017

How to Flash Stock ROM on Android OPPO R1X to Fix a Bootloop Removing Malware Stuck Guide

How to Flash Stock ROM on Android OPPO R1X to Fix a Bootloop Removing Malware Stuck Guide


How to Flash Stock ROM on Android OPPO R1X to Fix a Bootloop, Removing Malware, Stuck [Guide].

Flash Stock ROM on Android OPPO R1X. This guide will help you to Flash Stock ROM on Android OPPO R1X Smartphone. By flashing your Android phone you can get something new on your phone, such as new experience to use latest update of Stock ROM, or new installed Stock ROM after your phone died or bootloop, and much more. Before we proceed to flash this Android OPPO R1X Smartphone, let we know what is detail specification of this Android smartphone. OPPO R1X was released On 2015, January. And OPPO R1X is the smartphone that comes with 5,0 Inches IPS LCD capacitive touchscreen, 16M colors, Run on Android OS, v4.4 (KitKat) - Color OS 2.0.1 UI as it Operating System and supported with Qualcomm MSM8939 Snapdragon 615 Chipset, QQuad-core 1.7 GHz Cortex-A53 & quad-core 1.0 GHz Cortex-A53 CPU, GPU Adreno 405, combined with 2 GB of RAM as their engine. And you can enjoy exciting 13 MP on main camera, and 5 MP on secondary camera.

Now, we start to flash Stock ROM on Android OPPO R1X Smartphone. Just follow this guide below carefully. take your own risk, a damage or broken phone by following this tutorial is not our responsibility. 

Guide Flash Stock ROM OPPO R1X.

Before you flash OPPO R1X you must read this instruction carefully, so. you can get best result at the end of your flash.

Preparation.

  1. Make sure you have enough battery capacity on your OPPO R1X. Its recomended you have at least 80% of battery capacity.
  2. Always backup your important file (contact, music, video, app) that stored on OPPO R1X
  3. Prepare the Memory Card / SD Card which has a V-Gen Brand. For some reason OPPO R1X does not recognized besides V-Gen Memory card.
  4. Then download OPPO R1X Stock ROM.
    • Oppo R1X
    • http://assorted.downloads.oppo.com/firmware/R1x/R1xEX_11.A.05_OTA_INT_005_all_150706.zip
  5. Once download finish, now copy Stock ROM from computer to the phone memory or SD Card. but note that you copy this ROM at outside not to the public folder for easy finding. (if you download ROM Via PC)
  6. But, Stock ROM can be download directly from yourAndroid phone. And you must have a good  and stable internet connection for it, such as Wi-Fi connection.
  7. Rom download directly from the Android phone located in the File Manager / phone / download.

Flashing Stock ROM.

  1. To start flashing Stock ROM on OPPO R1X you must enter Recovery Mode. how to do it ?
    • Press and Hold Power Button + Volume Down.
  2. Then you will see menu like this picture. You can select English
  3. Flash Bootloop OPPO R1X
    Flash Bootloop OPPO R1X
  4. Select Wipe data and cache by pressing the power button. for Up and down choice, use the volume keys Up / Down, on the next Popup screen select Wipe your data cache to make faster process.
  5. Flash Bootloop OPPO R1X
    Flash Bootloop OPPO R1X
  6. If appears confirmation you can select : "YES"
  7. Flash Bootloop OPPO R1X
    Flash Bootloop OPPO R1X
  8. Then you will bring to previous menu, and you can select Install form sd.
  9. Flash Bootloop OPPO R1X
    Flash Bootloop OPPO R1X
  10. Now you will see 2 options. From mobile phone storage & form SD,.
  11. Flash Bootloop OPPO R1X
    Flash Bootloop OPPO R1X
  12. Previously you have copy firmware file on SD Card, So. now you must select From SD. and now you can see your Firmware file name on this screen.(Stock rom name is similar as shown on the picture below)
  13. Flash Bootloop OPPO R1X
    Flash Bootloop OPPO R1X
  14. Select this file name using Power Button
  15. For Up or Down navigation you can use volume Up and Down Button.
  16. Then you will see a confirmation page, and you can select yes to proceed this flash on OPPO R1X
  17. Flash Bootloop OPPO R1X
    Flash Bootloop OPPO R1X
  18. Just wait the process finish updating system, and your OPPO R1X will ask to you to reboot the device.
  19. Flash Bootloop OPPO R1X
    Flash Bootloop OPPO R1X
  20. Now you have finished flash Stock ROM on Android OPPO R1X Smartphone.


Available link for download

Read more »

Thursday, March 9, 2017

How to Fix Your Apple Id had been Disabled iPhone

How to Fix Your Apple Id had been Disabled iPhone


This is supremely annoying, particularly if you happen to you are making an attempt to learn your mail or get the most recent app from the App Store. But it is all for one of the best, as a result of typically this warning signifies that someone has been attempting to get into your Apple account, and Apple has thwarted them. Your Apple ID is locked sometimes when someone enters your password incorrectly too many occasions.
Heres the right way to unlocked a disabled Apple ID and account that is been locked for safety reasons.

How to unlock your disabled Apple ID

  1. Open Safari browser
  2. Visit iForgot site (http://iforgot.apple.com)
  3. Fill mandatory fields (First Name, Last Name and Email Address)
  4. Click Next button
  5. Enter the number and click on Next button, If you have two-step verification then enter verification code who receive on registered number.
  6. Enter your new password
  7. Click on Reset Password button.
Now you will have access app store with new Id password and never see "Your Apple Id had been Disabled" message on your iPhone.


Available link for download

Read more »

Saturday, March 4, 2017

How to Fix Windows blank after instaling Driver

How to Fix Windows blank after instaling Driver


Before explain, i will take note the main point why after instal driver, my windows is blank?

Its usually hapenned after instal driver by using Driverpack V.12 (drp). Not every laptop or netbook will have the some trouble after instal (drp). In my experience, i get  acer aspire one model 756, Acer model 725, Acer V5-121, and the similar of VGA chipset type.


Why my windows is blank after instal ServicePack versi 12?
Yes, its most important question before i get solve. It because DriverPack (especially versi 12 and lower) is not support to new laptop model.  When you instal driver use DRP, the driver perhaps installed,  but however drivers not update and not support. So, when finish, laptop will blank and windows is not work.

How to fix it? Need i install new windows?
No, it simple and we just only go to Windows Safe Mode.
 Steps
# Press F8 before Windows boating
# Choose Windows Safe Mode  (you must success go to Windows safe mode to fix this trouble)
# Go to Control panel home -  device manager ( see picture)


# Then, choose  Display adapter ( see picture)
Click Right - Disable


After finish, restart computer. Its surely done..
Then, you need to the driver update to instal driver you need. You can get them into official site in each laptop model. 

Please leave question if you get trouble, ill help as able i can. Thanks..

Note
If you get trouble, you can instal automatically by connecting to internet. See here step by step


Available link for download

Read more »

Thursday, March 2, 2017

Guide How to Flash Stock ROM on Android OPPO NEO 5 to Fix a Bootloop Removing Malware Stuck

Guide How to Flash Stock ROM on Android OPPO NEO 5 to Fix a Bootloop Removing Malware Stuck


[Guide] How to Flash Stock ROM on Android OPPO NEO 5 to Fix a Bootloop, Removing Malware, Stuck.

Flash Stock ROM on Android OPPO NEO 5. This guide will help you to Flash Stock ROM on Android OPPO NEO 5 Smartphone. By flashing your Android phone you can get something new on your phone, such as new experience to use latest update of Stock ROM, or new installed Stock ROM after your phone died or bootloop, and much more. Before we proceed to flash this Android OPPO NEO 5 Smartphone, let we know what is detail specification of this Android smartphone.OPPO NEO 5 was released On 2014, August. And OPPO NEO 5 is the smartphone that comes with 4,5 Inches IPS LCD capacitive touchscreen, 16M colors, Run on Android OS, v4.3 (Jelly Bean) - ColorOS v1.4 UI as it Operating System and supported with Qualcomm Snapdragon 400 Chipset, Quad-core 1.2 GHz Cortex-A7 CPU, GPU Adreno 305, combined with 1 GB of RAM as their engine. And you can enjoy exciting 5 MP on main camera, and 2 MP on secondary camera.

Now, we start to flash Stock ROM on Android OPPO NEO 5 Smartphone. Just follow this guide below carefully. take your own risk, a damage or broken phone by following this tutorial is not our responsibility. 

Guide Flash Stock ROM OPPO NEO 5.

Before you flash OPPO NEO 5 you must read this instruction carefully, so. you can get best result at the end of your flash.

Preparation.

  1. Make sure you have enough battery capacity on your OPPO NEO 5. Its recomended you have at least 80% of battery capacity.
  2. Always backup your important file (contact, music, video, app) that stored on OPPO NEO 5
  3. Prepare the Memory Card / SD Card which has a V-Gen Brand. For some reason OPPO NEO 5 does not recognized besides V-Gen Memory card.
  4. Then download OPPO NEO 5 Stock ROM.
    • Oppo NEO 5
    • http://assorted.downloads.oppo.com/firmware/1201/1201EX_11.A.11_OTA_INT_011_all_151020.zip
  5. Once download finish, now copy Stock ROM from computer to the phone memory or SD Card. but note that you copy this ROM at outside not to the public folder for easy finding. (if you download ROM Via PC)
  6. But, Stock ROM can be download directly from yourAndroid phone. And you must have a good  and stable internet connection for it, such as Wi-Fi connection.
  7. Rom download directly from the Android phone located in the File Manager / phone / download.

Flashing Stock ROM.

  1. To start flashing Stock ROM on OPPO NEO 5 you must enter Recovery Mode. how to do it ?
    • Press and Hold Power Button + Volume Down.
  2. Then you will see menu like this picture. You can select English
  3. Flash Bootloop OPPO NEO 5
    Flash Bootloop OPPO NEO 5
  4. Select Wipe data and cache by pressing the power button. for Up and down choice, use the volume keys Up / Down, on the next Popup screen select Wipe your data cache to make faster process.
  5. Flash Bootloop OPPO NEO 5
    Flash Bootloop OPPO NEO 5
  6. If appears confirmation you can select : "YES"
  7. Flash Bootloop OPPO NEO 5
    Flash Bootloop OPPO NEO 5
  8. Then you will bring to previous menu, and you can select Install form sd.
  9. Flash Bootloop OPPO NEO 5
    Flash Bootloop OPPO NEO 5
  10. Now you will see 2 options. From mobile phone storage & form SD,.
  11. Flash Bootloop OPPO NEO 5
    Flash Bootloop OPPO NEO 5
  12. Previously you have copy firmware file on SD Card, So. now you must select From SD. and now you can see your Firmware file name on this screen.(Stock rom name is similar as shown on the picture below)
  13. Flash Bootloop OPPO NEO 5
    Flash Bootloop OPPO NEO 5
  14. Select this file name using Power Button
  15. For Up or Down navigation you can use volume Up and Down Button.
  16. Then you will see a confirmation page, and you can select yes to proceed this flash on OPPO NEO 5
  17. Flash Bootloop OPPO NEO 5
    Flash Bootloop OPPO NEO 5
  18. Just wait the process finish updating system, and your OPPO NEO 5 will ask to you to reboot the device.
  19. Flash Bootloop OPPO NEO 5
    Flash Bootloop OPPO NEO 5
  20. Now you have finished flash Stock ROM on Android OPPO NEO 5 Smartphone.


Available link for download

Read more »