Showing posts with label neo. Show all posts
Showing posts with label neo. Show all posts
Saturday, March 25, 2017
Guide How to Flash Stock ROM on Android OPPO NEO 3 to Fix a Bootloop Removing Malware Stuck
Guide How to Flash Stock ROM on Android OPPO NEO 3 to Fix a Bootloop Removing Malware Stuck
[Guide] How to Flash Stock ROM on Android OPPO NEO 3 to Fix a Bootloop, Removing Malware, Stuck.
Flash Stock ROM on Android OPPO NEO 3. This guide will help you to Flash Stock ROM on Android OPPO NEO 3 Smartphone. By flashing your Android phone you can get something new on your phone, such as new experience to use latest update of Stock ROM, or new installed Stock ROM after your phone died or bootloop, and much more. Before we proceed to flash this Android OPPO NEO 3 Smartphone, let we know what is detail specification of this Android smartphone.OPPO NEO 3 was released On 2014, August. And OPPO NEO 3 is the smartphone that comes with 4,5 Inches IPS LCD capacitive touchscreen, 16M colors, Run on Android OS, v4.2.1 (Jelly Bean) - ColorOS v1.4 UI as it Operating System and Dual-core 1.3 GHz CPU, combined with 1 GB of RAM as their engine. And you can enjoy exciting 5 MP on main camera, and 2 MP on secondary camera.
Now, we start to flash Stock ROM on Android OPPO NEO 3 Smartphone. Just follow this guide below carefully. take your own risk, a damage or broken phone by following this tutorial is not our responsibility.
Guide Flash Stock ROM OPPO NEO 3.
Before you flash OPPO NEO 3 you must read this instruction carefully, so. you can get best result at the end of your flash.
Preparation.
- Make sure you have enough battery capacity on your OPPO NEO 3. Its recomended you have at least 80% of battery capacity.
- Always backup your important file (contact, music, video, app) that stored on OPPO NEO 3,
- Prepare the Memory Card / SD Card which has a V-Gen Brand. For some reason OPPO NEO 3 does not recognized besides V-Gen Memory card.
- Then download OPPO NEO 3 Stock ROM.
- Oppo NEO 3
- Once download finish, now copy Stock ROM from computer to the phone memory or SD Card. but note that you copy this ROM at outside not to the public folder for easy finding. (if you download ROM Via PC)
- But, Stock ROM can be download directly from yourAndroid phone. And you must have a good and stable internet connection for it, such as Wi-Fi connection.
- Rom download directly from the Android phone located in the File Manager / phone / download.
http://assorted.downloads.oppo.com/firmware/R831K/R831K_11.A.16_OTA_INT_016_all_151103.zip
Flashing Stock ROM.
- To start flashing Stock ROM on OPPO NEO 3 you must enter Recovery Mode. how to do it ?
- Press and Hold Power Button + Volume Down.
- Then you will see menu like this picture. You can select English
- Select Wipe data and cache by pressing the power button. for Up and down choice, use the volume keys Up / Down, on the next Popup screen select Wipe your data cache to make faster process.
- If appears confirmation you can select : "YES"
- Then you will bring to previous menu, and you can select Install form sd.
- Now you will see 2 options. From mobile phone storage & form SD,.
- Previously you have copy firmware file on SD Card, So. now you must select From SD. and now you can see your Firmware file name on this screen.(Stock rom name is similar as shown on the picture below)
- Select this file name using Power Button
- For Up or Down navigation you can use volume Up and Down Button.
- Then you will see a confirmation page, and you can select yes to proceed this flash on OPPO NEO 3
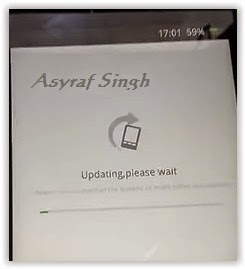
- Just wait the process finish updating system, and your OPPO NEO 3 will ask to you to reboot the device.
- Now you have finished flash Stock ROM on Android OPPO NEO 3 Smartphone.
 |
| Flash Bootloop OPPO NEO 3 |
 |
| Flash Bootloop OPPO NEO 3 |
 |
| Flash Bootloop OPPO NEO 3 |
 |
| Flash Bootloop OPPO NEO 3 |
 |
| Flash Bootloop OPPO NEO 3 |
 |
| Flash Bootloop OPPO NEO 3 |
 |
| Flash Bootloop OPPO NEO 3 |
 |
| Flash Bootloop OPPO NEO 3 |
Available link for download

Thursday, March 2, 2017
Guide How to Flash Stock ROM on Android OPPO NEO 5 to Fix a Bootloop Removing Malware Stuck
Guide How to Flash Stock ROM on Android OPPO NEO 5 to Fix a Bootloop Removing Malware Stuck
[Guide] How to Flash Stock ROM on Android OPPO NEO 5 to Fix a Bootloop, Removing Malware, Stuck.
Flash Stock ROM on Android OPPO NEO 5. This guide will help you to Flash Stock ROM on Android OPPO NEO 5 Smartphone. By flashing your Android phone you can get something new on your phone, such as new experience to use latest update of Stock ROM, or new installed Stock ROM after your phone died or bootloop, and much more. Before we proceed to flash this Android OPPO NEO 5 Smartphone, let we know what is detail specification of this Android smartphone.OPPO NEO 5 was released On 2014, August. And OPPO NEO 5 is the smartphone that comes with 4,5 Inches IPS LCD capacitive touchscreen, 16M colors, Run on Android OS, v4.3 (Jelly Bean) - ColorOS v1.4 UI as it Operating System and supported with Qualcomm Snapdragon 400 Chipset, Quad-core 1.2 GHz Cortex-A7 CPU, GPU Adreno 305, combined with 1 GB of RAM as their engine. And you can enjoy exciting 5 MP on main camera, and 2 MP on secondary camera.
Now, we start to flash Stock ROM on Android OPPO NEO 5 Smartphone. Just follow this guide below carefully. take your own risk, a damage or broken phone by following this tutorial is not our responsibility.
Guide Flash Stock ROM OPPO NEO 5.
Before you flash OPPO NEO 5 you must read this instruction carefully, so. you can get best result at the end of your flash.
Preparation.
- Make sure you have enough battery capacity on your OPPO NEO 5. Its recomended you have at least 80% of battery capacity.
- Always backup your important file (contact, music, video, app) that stored on OPPO NEO 5,
- Prepare the Memory Card / SD Card which has a V-Gen Brand. For some reason OPPO NEO 5 does not recognized besides V-Gen Memory card.
- Then download OPPO NEO 5 Stock ROM.
- Oppo NEO 5
- Once download finish, now copy Stock ROM from computer to the phone memory or SD Card. but note that you copy this ROM at outside not to the public folder for easy finding. (if you download ROM Via PC)
- But, Stock ROM can be download directly from yourAndroid phone. And you must have a good and stable internet connection for it, such as Wi-Fi connection.
- Rom download directly from the Android phone located in the File Manager / phone / download.
http://assorted.downloads.oppo.com/firmware/1201/1201EX_11.A.11_OTA_INT_011_all_151020.zip
Flashing Stock ROM.
- To start flashing Stock ROM on OPPO NEO 5 you must enter Recovery Mode. how to do it ?
- Press and Hold Power Button + Volume Down.
- Then you will see menu like this picture. You can select English
- Select Wipe data and cache by pressing the power button. for Up and down choice, use the volume keys Up / Down, on the next Popup screen select Wipe your data cache to make faster process.
- If appears confirmation you can select : "YES"
- Then you will bring to previous menu, and you can select Install form sd.
- Now you will see 2 options. From mobile phone storage & form SD,.
- Previously you have copy firmware file on SD Card, So. now you must select From SD. and now you can see your Firmware file name on this screen.(Stock rom name is similar as shown on the picture below)
- Select this file name using Power Button
- For Up or Down navigation you can use volume Up and Down Button.
- Then you will see a confirmation page, and you can select yes to proceed this flash on OPPO NEO 5
- Just wait the process finish updating system, and your OPPO NEO 5 will ask to you to reboot the device.
- Now you have finished flash Stock ROM on Android OPPO NEO 5 Smartphone.
|
| Flash Bootloop OPPO NEO 5 |
|
| Flash Bootloop OPPO NEO 5 |
|
| Flash Bootloop OPPO NEO 5 |
|
| Flash Bootloop OPPO NEO 5 |
|
| Flash Bootloop OPPO NEO 5 |
|
| Flash Bootloop OPPO NEO 5 |
|
| Flash Bootloop OPPO NEO 5 |
|
| Flash Bootloop OPPO NEO 5 |
Available link for download
Tuesday, January 10, 2017
How to Flash Oppo Neo 3 R831K with SP Flash tool Tested
How to Flash Oppo Neo 3 R831K with SP Flash tool Tested
When in Oppo Neo 3 R831K to be software related issues then you can use this guide because it is very simple to use and in this no need any box just download flash tool or stock ROM from the below link and you can do, if device in hardware related problem then cant use this guide because dead will be dead, first check in device which shorting or not first remove shorting, you can use this guide when your device in hang on logo, restarting, auto turn on internet connection, auto turn on wifi connection, auto apk installing, auto gone balance, pattern lock, screen lock etc these type and this is for everyone who new fresher technician or experience technician in android software related, before use remember of must be working well all are required which you can see in this method it below to be mention, different to be error when you try to flash or upgrade first of USB not recognized this error possible when micro USB not working, battery not charged, phone USB socket not working properly so if you fail with this method just write down your comment on below comment box i will soon possible to fix it, first take backup into device if live otherwise dead you cant take backup, this method use when device in dead condition also but must be in software problem in hardware device not be live.
If you want to repair your device, you can try to repair it. You have to charge your battery with any charger and charged it by 70%. Your data is very important for you so it is good to do a backup of your data it may consist like your contact details,your important messages, your emails or any other important thing which you feel to be the backup in your device. This backup can be done on another device. we have to do the backup because after a format of your device, all your data will be gone and it will not be recovered. For backup in other devices you can use other external device like your hard drive, sd card or any other suitable devices.
If you are doing by your own.do it at your own risk as we dont take any responsibility if your device is damaged
If you want to repair your device, you can try to repair it. You have to charge your battery with any charger and charged it by 70%. Your data is very important for you so it is good to do a backup of your data it may consist like your contact details,your important messages, your emails or any other important thing which you feel to be the backup in your device. This backup can be done on another device. we have to do the backup because after a format of your device, all your data will be gone and it will not be recovered. For backup in other devices you can use other external device like your hard drive, sd card or any other suitable devices.
If you are doing by your own.do it at your own risk as we dont take any responsibility if your device is damaged
Required for Flash to Oppo Neo 3 R831K
- Oppo Neo 3 R831K Handset with good battery charged , may be charged up to 90% and do not try with low battery
- Oppo Neo 3 R831K Stock ROM it must be tested means working well | Download here
- Oppo Neo 3 R831K Flash tool | Download here
- Oppo Neo 3 R831K USB (Flashing) Driver | Download here
- Good Quality Micro USB Cable
- Computer or Laptop
Procedure for Oppo Neo 3 R831K
- Download tested all are files from the above download link, if link not working just leave your comment on below comment box i will soon fix if possible
- Installing WinZip in your Computer or Laptop if not installed and Extract all are file to Desktop or as you like path from the WinZip
- Open Flash tool folder and choose flash_tool.exe file open it
- Click on Scatter-loading button and choose MT6572_Android_scatter_emmc.txt file and click OK
- Click on Download button and Just Insert USB Cable into device wait until Driver Installing if auto Driver not installed then update from the above links driver
- If Device Dead or not detect then try to Press and hold Volume Up button and Insert USB Cable
- Wait until Finished Process, do not try to unplug device while in flashing mode
- Congratulation you are done
Oppo Neo 3 R831K Flash done Screenshot:
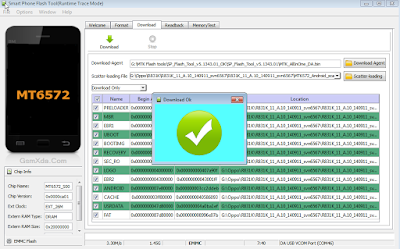
Available link for download
Tuesday, December 13, 2016
Guide How to Hard Reset Factory Reset Android OPPO NEO 3 R831K
Guide How to Hard Reset Factory Reset Android OPPO NEO 3 R831K
[Guide] How to Hard Reset / Factory Reset Android OPPO NEO 3 R831K.
Hard Reset OPPO NEO 3 R831K. On this guide guidebelajar will show you how to Hard Reset / Factory Reset Android OPPO NEO 3 R831K. Perform Hard reset on android device will wipe or deleted all data stored and App installed on internal phone memory, so you must backup all data before perform it. But data stored on MicroSD will not be affected. If you have set up device with your Google accounts, your contact and and email information is automatically backed up to the Gmail server.
OPPO NEO 3 R831K is the smartphone released on August, 2014. with 4,5 Inchi IPS LCD capacitive touchscreen, 16M colors, work on Android OS, v4.2.1 (Jelly Bean), and supported with Dual-core 1.3 GHz CPU, combined with 1 GB of RAM, 5 MP on primary camera and 2 MP on secondary camera.
Some People say that Hard reset process is call with master reset or factory reset. Many people asking why should we perform hard reset to our phone. The logical answer that can I say for this asking is :
- We want to remove all personal data and setting that was stored in OPPO NEO 3 R831K device.
- Restore OPPO NEO 3 R831K to Default Factory Setting.
- Because we will sell our OPPO NEO 3 R831K Android phones
- There are many bug on OPPO NEO 3 R831K.
- We have forgotten on PIN or Patern Lock at OPPO NEO 3 R831K.
- OPPO NEO 3 R831K has a persistent problem that cannot be solved.
- We will give our OPPO NEO 3 R831K away to some one else, and we dont want that one know everything about our secret data, so we have to erase all data before back up it.
- Our OPPO NEO 3 R831K has been lagging and stuck on android logo, this call with bootloop.
- and many other reason.
1st Methode. Hard Reset OPPO NEO 3 R831K Using Software Menu :
- Make sure your batery is fully charged, Recomended you have 80% of battery capacity
- Then Backup your OPPO NEO 3 R831K . see this guide
- Open the application tray, pointing up located in the middle at the bottom of the display screen
- Go to menu: Setting >
- Select Back Up and Reset>
- Factory Data Reset >
- Reset Phone
- Choose Erase everything to confirm that you already to perform hard reset on OPPO NEO 3 R831K
- OPPO NEO 3 R831K will continue to hard reset process to restore factory default.
- You can not use this methode to reset your phone if it lost or stolen.
2ndMethode. Hard Reset OPPO NEO 3 R831K Using Hardware Keys:
- Make sure your battery is fully charged, we recomended that your battery has 80% power
- Always BackUp your important data that store in OPPO NEO 3 R831K . see this guide
- Turn Off your OPPO NEO 3 R831K by hold and press Power Button for a second.
- Release any SIM card and SD card that was installed on your OPPO NEO 3 R831K smartphone.
- Then press and hold a combination key Power button + Volume Down.

hard reset OPPO NEO 3 R831K - The phone will vibrate and show Oppo Logo on screen, release only power button.
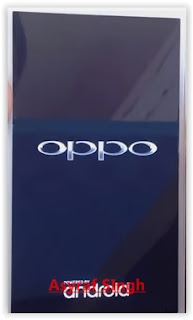
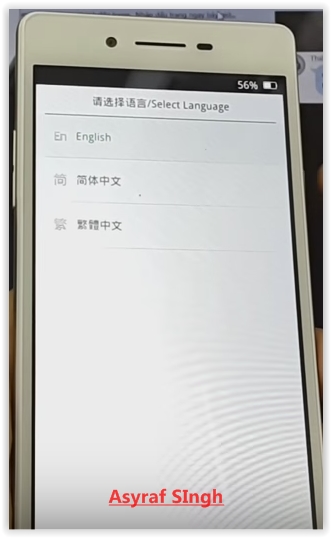
oppo logo - hard reset oppo NEO 3 R831K - Now, release All button when your phone show language choice on screen.
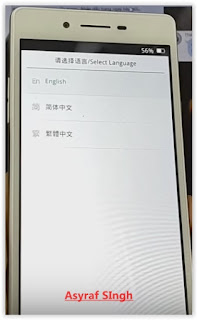
Hard Reset OPPO NEO 3 R831K - You can use volume Down and Volume Up to navigate all menu. and Power Button for confirm your choice. or you can tap menu on screen.
- Now select English to enter ColorOS Recovery.

ColorOS Recovery - Reset Android OPPO NEO 3 R831K - Then select Wipe Data and cache.
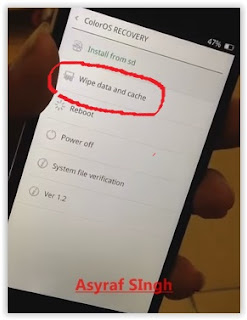
Hard Reset OPPO NEO 3 R831K - On the next screen select Wipe All Data and Removable Applications.

Wipe All Data and Removable Applications - On the next screen you will show a confirmation about Wipe All Data and Removable Applications, because All Data and Removable Applications will be wiped, this operation can not be undone. And now select OK.

Wipe All Data and Removable Applications - Now, you will see a wipe data and cache process to wipe all data stored on your OPPO NEO 3 R831K phone.
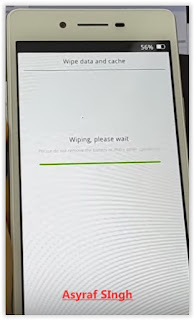
hard reset OPPO NEO 3 R831K - Wait untill everything finish,
- If you see a message that wiped data successfully appear o screen, its mean you have successfully perform hard reset on this OPPO NEO 3 R831K phone.

hard reset OPPO NEO 3 R831K - Now, select reboot, to reboot your device.

Hard Reset OPPO NEO 3 R831K. - Select OK to confirm reboot OPPO NEO 3 R831K .
- Finish, Now you have successfully Hard Reset / Factory Reset Android OPPO NEO 3 R831K.




Video Guide.
Available link for download
Saturday, November 12, 2016
How To Flash Oppo NEO 3 R831K With Flash Tools Guaranteed Work 100
How To Flash Oppo NEO 3 R831K With Flash Tools Guaranteed Work 100
Hello Every Body, Now Localtechno will share with you all about "Cara Flash Oppo Neo 3 R831K Dijamin Work 100% by Localtechno" Bootloop is something that might make you dizzy. Therefore localtechno will try to help you in a way that is already localtechno try and work 100 %
Download the first material here :
- 1. Download Firmware Oppo Neo 3 R831K in HERE
- 2. Download Driver in HERE
- 3. Download Flash Costume For Oppo In HERE
If you have downloaded all the tools and firmware for flashing. Now follow these steps :
- 1. Ekstrack Flash Tools and Firmware that you have downloaded
- 2. Install Driver
- 3. Run Flash Tools with the right click and choose run as administrator
- 4. In The Scatter-Loading Button, choose MT6572_Android_scatter.txt
- 5. Remember !!! uncheck PRELOADER danger of Death Total
- 6. Check List "DA DL With Check Sum" and Then Click Download Button
- 7. Turn Off Your Android Device and Plug on your computer with USB Cable
- 8. Wait Until Finish and Reboot Into Recovery and then wipe data & Chace
- 9. Reboot
You can also see a video tutorial and screenshots by localtechno below :


Available link for download
Subscribe to:
Posts (Atom)