Thursday, April 13, 2017
GNOME 3 18 Released See What s New
GNOME 3 18 Released See What s New

Changes in GNOME 3.18

Yet another new feature in GNOME 3.18, which you might not notice at first, is automatic screen brightness, for computers that have an integrated light sensor. This feature is enabled by default and it can be disabled from the Power settings.

Other changes:
- improved touchscreen support: its now easier to select, cut, copy and paste text using a touchscreen, via new popovers and also, the handles used to adjust text selections have been made bigger;
- Kinetic scrolling (scrolling feels physical) is now handled by GTK+ - this should fix this type of scrolling if it didnt work for you previously. Furthermore, a new auto-scroll feature has been added (to activate it, press the scrollbar with the right mouse or touchpad button);
- the latest GTK+ 3.18 includes new typographic features such as colored underlines, letterspacing and translucent font colors as well as support for custom font maps and font options;
- various Wayland improvements, including HiDPI support (as well as HiDPI cursor support), support for copy, paste and drag and drop between windows, including between two Wayland apps and between Wayland and X11 apps, GTK+ OpenGL support under Wayland and more. Also, its now possible to use multitouch gestures such as pinch to zoom and rotate with a touchpad (previously, they were only available with a touchscreen);
- Bluetooth sharing has been merged into the main Bluetooth settings, so it is easier to find;
- The animation of progress spinners has been made super smooth.
GNOME applications
- the files places sidebar, displayed in the Files app and in open and save dialogs, has been reworked and it now includes a new location, called "Other Locations", which provides a useful overview of local and network locations;
- the copy/move dialog is now in the form of a button on the Files toolbar which shows progress information along with more information when pressed;
- improved folder creation as well as file and folder renaming - these now use dialogs and popovers (according to the release notes, these changes were introduced following user testing results);
- search as you type has been added to the open and save dialogs;
- placeholders are now displayed when folders are empty, or when no search results are found;
- recursive search is now automatically disabled when searching remote locations, in order to prevent performance problems;
- theres a new option in Dconf (org > gnome > nautilus > preferences) which allows disabling recursive search. When disabled, the search will only look for files and folders in the current directory, ignoring subfolders.
- recent files lists have been improved, and now show the full location of each file;
- Google Drive integration (which I already mentioned above).


Changes in other GNOME applications:
- Maps is now able to indicate your direction as well as location. It is also possible to enter latitude/longitude coordinates or a geoURI;
- Web, the GNOME browser is faster and also, the screen will no longer automatically lock when you are watching a fullscreen video in Web;
- Builder has a new workspace system which allows different panels to be added and removed, a new appearance for the pop-up command bar, a new shortcuts window (to open it, use Ctrl + Shift + ?) as well as a new plug-in system which allows plug-ins to be written using Python 3, C or Vala;
- the collections dialog has been greatly improved in Documents, with a better layout and easier renaming and deletion;
- the layout of the Logs application has been improved, so that it is more efficient and easier to read. It is also possible to select which boot to view logs from;
- GNOMEs IRC application, Polari, has received paste service integration along with other improvements such as a better first run experience, improved feedback for connection errors and better indicators for new messages;
- Boxes includes a new list view with more details about your boxes along with other improvements.
 |
| GNOME Builder |


Getting GNOME 3.18
You may also want to check out the official GNOME 3.18 release notes.
Available link for download
Monday, April 3, 2017
Gigabyte Overclocking Crew Set New XTU World Record
Gigabyte Overclocking Crew Set New XTU World Record
Computex 2015 is here and our overclocking crew is busy settings world records already. Coldest, Dinos22, HiCookie, SniperOz and Sofos1990 kicked things off with the XTU World Record set on GIGABYTE X99 SOC CHAMPION and Intel 5960X.
Hwbot score link: http://hwbot.org/submission/2880776_dinos22_xtu_core_i7_5960x_3089_marks


Available link for download
Sunday, February 19, 2017
GIGABYTE X99 New Function Ambient LED
GIGABYTE X99 New Function Ambient LED
With the new X99 motherboards LED design, GIGABYTE is introducing Ambient LED. In the video bellow, Colin introduces this function made to help control how your GIGABYTE X99 motherboards LEDs react.?
Available link for download
Saturday, February 11, 2017
GIGABYTE X99 New Function QFlash Plus
GIGABYTE X99 New Function QFlash Plus
On an healthy running system, you can easily update your BIOS using the @BIOS option found in the App Center. But in the unfortunate event that both your main BIOS and Backup BIOS becomes unavailable, or that you have a new CPU that requires a different BIOS, you will not be able to boot up your system to access the App Center. That is where QFlash Plus comes handy. Here are the steps to follow to flash your BIOS using QFlash Plus.
- Make sure your USB thumb drive is formatted in FAT32 and upload the BIOS you want to flash to it. You can find the latest BIOS version for your motherboard on GIGABYTE’s website : http://www.gigabyte.com/support-downloads/download-center.aspx?ck=2
- Rename that BIOS file to GIGABYTE.BIN
- Turn OFF your system and plug in your USB thumb drive in the white USB port located at the BACK I/O panel.
- Turn your system ON and wait for the BIOS to be flashed. This step may take a few minutes, do not reboot your system or remove the USB thumb drive during that process. An LED located next to the white USB port will blink showing that the new BIOS is being uploaded to your system. Once this LED is turned off, the process is complete.
- Turn off your system, remove the USB thumb drive and restart your system.
Voila!
In the following video, Colin gives you a demonstration on how to use QFlash Plus on GIGABYTE X99 motherboards.
Available link for download
Wednesday, February 1, 2017
gtk3 nocsd Module To Disable Client Side Decorations Sees New Release
gtk3 nocsd Module To Disable Client Side Decorations Sees New Release
- added bash completion support for gtk3-nocsd wrapper;
- added custom CSS for cosmetic improvements of the header bar look when CSDs are disabled (should be largely theme-agnostic, but tested against Adwaita);
- drop compositor trick in Gtk+3 3.16.1 or higher; the set_titlebar function is reimplemented there anyway, and this should solve some possible issues with newer GTK3 versions;
- selectively disable decorations: dont drop the application menu icon by using set_show_close_button (FALSE), but instead replace the decoration_layout string of header bars to remove the "icon", "minimize", "maximize" and "close" buttons. This should fix issues with missing GNOME menu (with gThumb 3.4.x as an example);
- also override GtkDialogs GtkBuildable->add_child and the instance initializer of GtkShortcutsWindow; previously CSDs werent removed from all windows because of that;
- added a test that verifies that no Glib/Gtk symbols are imported during link time (to make sure preloading works with BINDNOW binaries that dont use Gtk);
- Improvements to the documentation.


For installing gtk3-nocsd in Ubuntu and its optional configuration, see our initial (updated) article: How To Disable GTK3 Client-Side Decorations (Header Bars)
Available link for download
Tuesday, January 31, 2017
GAME NARUTO MUGEN THE NEW ERA PC
GAME NARUTO MUGEN THE NEW ERA PC
Satu lagi game naruto yang seru, Naruto Mugen The New ERA.

Win XP / 7
Pentium IV / Better
32MB VRAM
700MB Disk space
DOWNLOAD:
NARUTO MUGEN THE NEW ERA
MIRROR
FOLDER MEDIAFIRE PART 1 - PART 15
Available link for download
Saturday, January 7, 2017
Game Tactical Soccer The New Season
Game Tactical Soccer The New Season

Tactical Soccer The New Season - adalah game bergenre Football. Dalam game ini anda dapat melatih kahlian anda untuk menjadi seorang manager atau pelatih sepak bola yang hebat. Anda dalam game ini akan diminta untuk mengatur strategi permainan dalam sepak bola dan juga mengatur polo bermain serta letak para pemainnya.
ScreenShoot :


System Requirements :
- OS : Windows xp, 7, vista, 8, 8.1, 10
- Ram : 3 GB
- Processor : Quad Core 2.3 Ghz
Available link for download
Thursday, December 29, 2016
Hamachi Linux GUI Haguichi 1 3 0 Released With New UI
Hamachi Linux GUI Haguichi 1 3 0 Released With New UI
 |  |

Other changes in Haguichi 1.3.0:
- added short text to empty network list on how to add a network;
- added symbolic application and panel icons for adwaita-icon-theme;
- commands that don’t actually exist are not shown as member action any more;
- unicode characters are now used for ellipsis and quotation marks;
- changed autostart .desktop file installation path back to /usr/etc/xdg/autostart;
- dropped support for Hamachi version 2.1.0.81 and older;
- removed deprecated status icon;
- updated translations.
Install Haguichi in Ubuntu or Linux Mint via PPA
sudo add-apt-repository ppa:webupd8team/haguichi
sudo apt-get update
sudo apt-get install haguichi- for Ubuntu 15.04 and newer:
sudo apt-get install haguichi-indicatorsudo apt-get install haguichi-appindicatorReport any bugs you may find @ Launchpad.
Available link for download
Wednesday, December 28, 2016
GIGABYTE New 100 Series Overview by Sin0822
GIGABYTE New 100 Series Overview by Sin0822
Many of you guys are very excited at the coming of the next generation of CPU from Intel and also at the next gen. of mobos that comes along with it. And so we are!!!
As you all know I am sure, Computex 2015 took place in our backyard last week and we had the visit of a very well known reviewer/overclocker/blogger/party animal at our suite, Sin0822. Of course we couldnt stop him for doing a good coverage of the new Z170X-Gaming G1... so here it is for you alls pleasure:
Available link for download
Wednesday, December 21, 2016
Get New Wine Features Faster With Wine Staging PPA
Get New Wine Features Faster With Wine Staging PPA
The latest Wine Staging provides the following extra features and bug fixes:
- CSMT (Commandstream multithreading) for better graphic performance
- CUDA / PhysX / NVENC Support for NVIDIA graphic cards
- DXVA2 GPU video decoding (experimental)
- EAX 1 support
- Fixes for various upstream regressions
- Job Object support
- Loading of .NET CLI images without entry point
- Named Pipe message mode support (Linux kernel >= 3.4 only)
- Performance improvements for IO-heavy programs and memory allocation functions
- S3 texture compression (DXTn) support
- Threadpool API support
- Various improvements to d3dx9
- Various speed improvements (shared memory, RT priority)
- Windows ACL support
- Wine PulseAudio driver

Install Wine Staging in Ubuntu or Linux Mint
sudo add-apt-repository ppa:pipelight/stable
sudo apt-get update
sudo apt-get install --install-recommends wine-stagingsudo apt-get install wine-staging-amd64/opt/wine-staging/bin/wine
/opt/wine-staging/bin/winecfgsudo apt-get install wine-staging-compatFor more information, see the Wine Staging Usage page.
Available link for download
Thursday, December 1, 2016
How Long Should Charge The New HP Compaq Laptop Battery For The First Time and How To Maintain It For Better Battery Life
How Long Should Charge The New HP Compaq Laptop Battery For The First Time and How To Maintain It For Better Battery Life
 When we receive a new laptop or notebook, the first question comes in everyones head is How Long Should I Charge My Laptop battery for the first time?. When you ask with your friends or others you may get different answers like 8 hours, 12 hours, 24 hours, etc..
I too had the same question when I got my first laptop and the same question worried me till I found the great article on HP Pavilion Notebook PCs support. As far as I understand from the article, We can disconnect the laptop charger whenever the charging reach at 100%.
In this post I included the link to the official article "Understanding Lithium-Ion and Smart Battery Technology" by HP Pavilion Notebook PCs support and directly included one of the answers in the same article which helped me most to clear the confusion.
How does the notebook charge the battery?
Adhering to recommendations by battery cell suppliers and best practices, the notebook does not continue charging the battery once the battery is 100% fully charged. Once the battery is 100% fully charged, the terminate charge bit is set, preventing the battery from charging. The battery does not clear the terminate charge bit until after the fuel gauge falls below 94%. Once the battery fuel gauge falls below 94%, the charge bit is set and the battery does begin charging with the AC adaptor connected to the notebook. If the AC adaptor is disconnected between the levels of 94% to 100%, the charge bit will not be set and the notebook will no longer charge the battery.
Read here the complete Article by HP Support
Or
Download the Article as PDF
Available link for download
Sunday, November 13, 2016
Gunakan New Gmail Drag dan Drop Fitur
Gunakan New Gmail Drag dan Drop Fitur
Langkah-langkah untuk menggunakan Drag dan Drop dalam surat Google :
1 . Login dengan akun Gmail Anda dan mulai membuat email baru.
2 . Sekarang drag gambar yang dipilih dari komputer lokal atau lokasi web dan drop di daerah menyusun Gmail menggunakan mouse Anda .

3 . Setelah Anda Drag dan Drop gambar , Anda akan melihatnya di daerah menyusun mail Anda . Ini akan memakan waktu tergantung pada ukuran gambar .

Available link for download
Saturday, November 12, 2016
How to remove charging time ads in xender new update
How to remove charging time ads in xender new update


Available link for download
How To Reset HostGator Login Password And Get A New One You Wont Get A New One Using Request a Password Reset Link
How To Reset HostGator Login Password And Get A New One You Wont Get A New One Using Request a Password Reset Link
 You may forget the password in many sites and got reset in a couple of minutes using the lost password, recover or reset password links. But, you cant reset the forgotten password easily with Hostgator. I have been using Hostgator for the last 6 months and manually entered the login password only two or three times. All the other time it was easy for me as Chrome synced the password between my home PC and laptop.
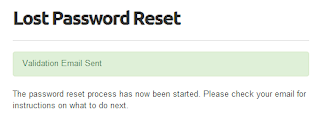
The problem occurred when I was out of my town and went to an internet cafe for a quick update of a clients website. As a public cafe I was aware to sync the password using chrome and I couldnt get to login. As everyone does I request for a new password using the Request a Password Reset as usual, I entered my email address on the Lost Password Reset page and clicked the submit button.
When I clicked the password reset link received in my inbox it showed "Password Reset Successful" nothing more. There is no field to enter a new password or anything. When I asked in the Hostgator live chat, they sent a new password and they said I cant choose my own password due to security issues.

In this post I included the steps I did to get a new Hosgator login password.
Request A New Hostgator Password
1. Go to Hostgator chat link - International user | Indian User2. Fill out the details like below and click continue. (Use your name and domain)

3. On the next page you will see Search Our Knowledge Base dont click on any link click Start Live Chat.
4. then they will ask to enter login details ... click Skip.
Thats it.. The chat window will open and there you can ask for a new password.
Available link for download
Monday, October 17, 2016
Googles New Trick Kill Your Time
Googles New Trick Kill Your Time


if you are bored, go to Google and type "Im feeling curious" and guess what? A dynamic answer box will come up,that gives new fun facts each time & it will ask for more questions ;) Actually it will show a random fact.The short & to the point and fun answer is accompanied with a link to the complete content. Below that, there is a button saying “Ask another question” that will return a new search result with a new fun fact in the dynamic answer box.

After telling me about Why is the Python programming language called Python?, Google taught me regarding "Who Named Pluto & Why?" when I clicked on the ask another question button. Isnt that amazing ?
Dont underestimate Google’s ability to keep you entertained :D
--------------------
Regards
Shankha Jana
Available link for download